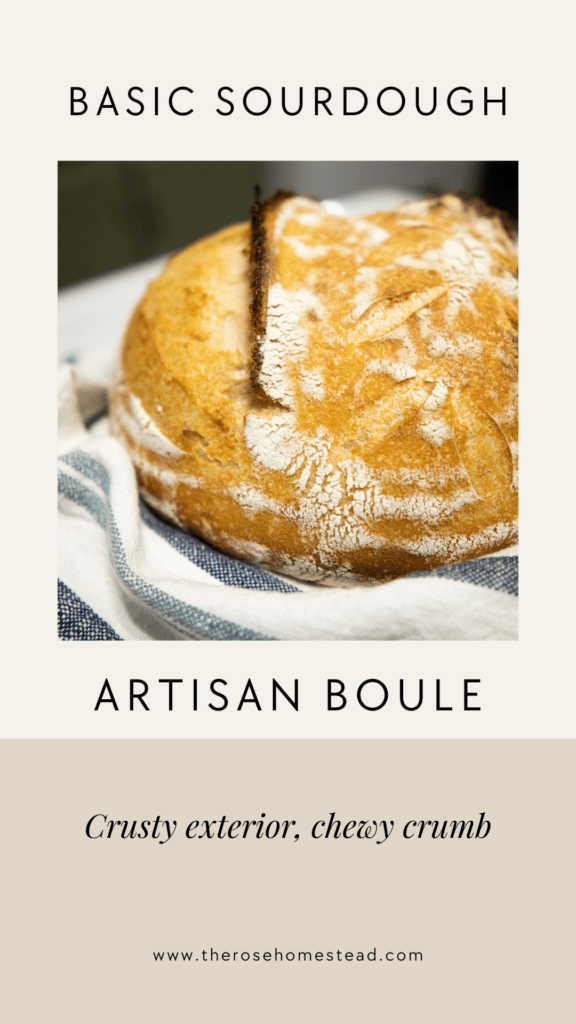
Basic Sourdough Artisan Bread | Perfect for Beginners
This basic sourdough artisan bread is more hands on and serves as a good way to learn the feel of a good dough. This artisan sourdough bread dough can be placed in the fridge once it is shaped and baked off the next day making it a very versatile recipe.
**This post contains affiliate links. I may make a small commission on sales at no extra cost to you**
If you have been following along with me for a while, you know I like to keep things very simple when it comes to sourdough.
However, I know there are some that really enjoy the technical side of sourdough and the weighing of ingredients, therefore, I want to share my “technical” loaf of sourdough bread recipe.
In order for this bread to rise, you will need an active/fed sourdough starter. This means your starter should have been fed within the last 4-12 hours and be very bubbly and active.
I like to feed my starter 1-2 times a week and after it becomes active, I store it in the fridge.
What is active sourdough starter?
Active starter is starter that has been fed within the last 24 hours and is bubbly and active looking. It should have a pleasant yeasty smell.
What is Sourdough Discard?
Sourdough starter discard is starter that has not been fed recently and may have a liquid on top. The smell will be like acetone. This is normal and just means the starter has exhausted all of the flour and water it was fed.
Why I love making Sourdough Bread
There is something magical about mixing flour, water, salt, and starter and seeing it become a beautiful loaf of bread!
The process of making sourdough bread is one of my favorite activities. Knowing I can take flour and water and make wild yeast is so cool to me.
With sourdough, you don’t need any commercial yeast for your bread products!
To be honest with you, I have spent a lot of time simplifying the process over the years, but, sometimes I want to do the full out hands on process.
Even though it is more involved, it takes me back to when I first started my sourdough journey.
Try this Easy No Knead Sourdough Sandwich Loaf
Equipment you will need for this basic sourdough boule recipe
Kitchen Scale
This recipe is measured in grams. A kitchen scale is a very inexpensive tool and very useful in the kitchen.
Dutch Oven
It’s important to have a cooking vessel that has a lid. The lid holds in the steam for a good rise. I prefer using a Dutch Oven
Proofing Basket or Banneton Basket
This BASKET helps hold the shape of the dough while it is on its final rise.
Ingredients you will need to make this recipe
Flour
You can use all purpose flour, bread flour, whole wheat flour, or a combination. In my experience a mixture of half all purpose flour and half freshly milled flour makes the most delicious loaf.
For my freshly milled loaf I use a Nutrimill Grain Mill
Sourdough Starter
For this recipe, you will need to use active sourdough starter.
Water
For best results, use filtered water.
Salt
Since this recipe has only 4 ingredients, I find it important to use the highest quality ingredients possible. We use Redmond Real Salt
Step by step instructions for making a Sourdough Boule
Autolyse
To start the process you will need to add the flour and water to a large bowl and mix well.
If your house is really cool, you may want to start with warm water (under 100 degrees F).
Cover and let sit at room temperature for 30 minutes.
This is called the Autolyse. The purpose of this resting time is to allow the flour to completely absorb the water.
You will notice the difference in the texture of the dough in that 30 minute resting period.
Mixing the dough
After the dough rest for 30 minutes, it’s time to add the starter and salt.
I put the mixing bowl back on the scale and zero it out. Add the starter and sprinkle on the salt.
I just use my clean hands to mix the starter and salt into the dough. It will take a couple of minutes to fully incorporate.
You will know it is mixed well when the dough gets more sticky.
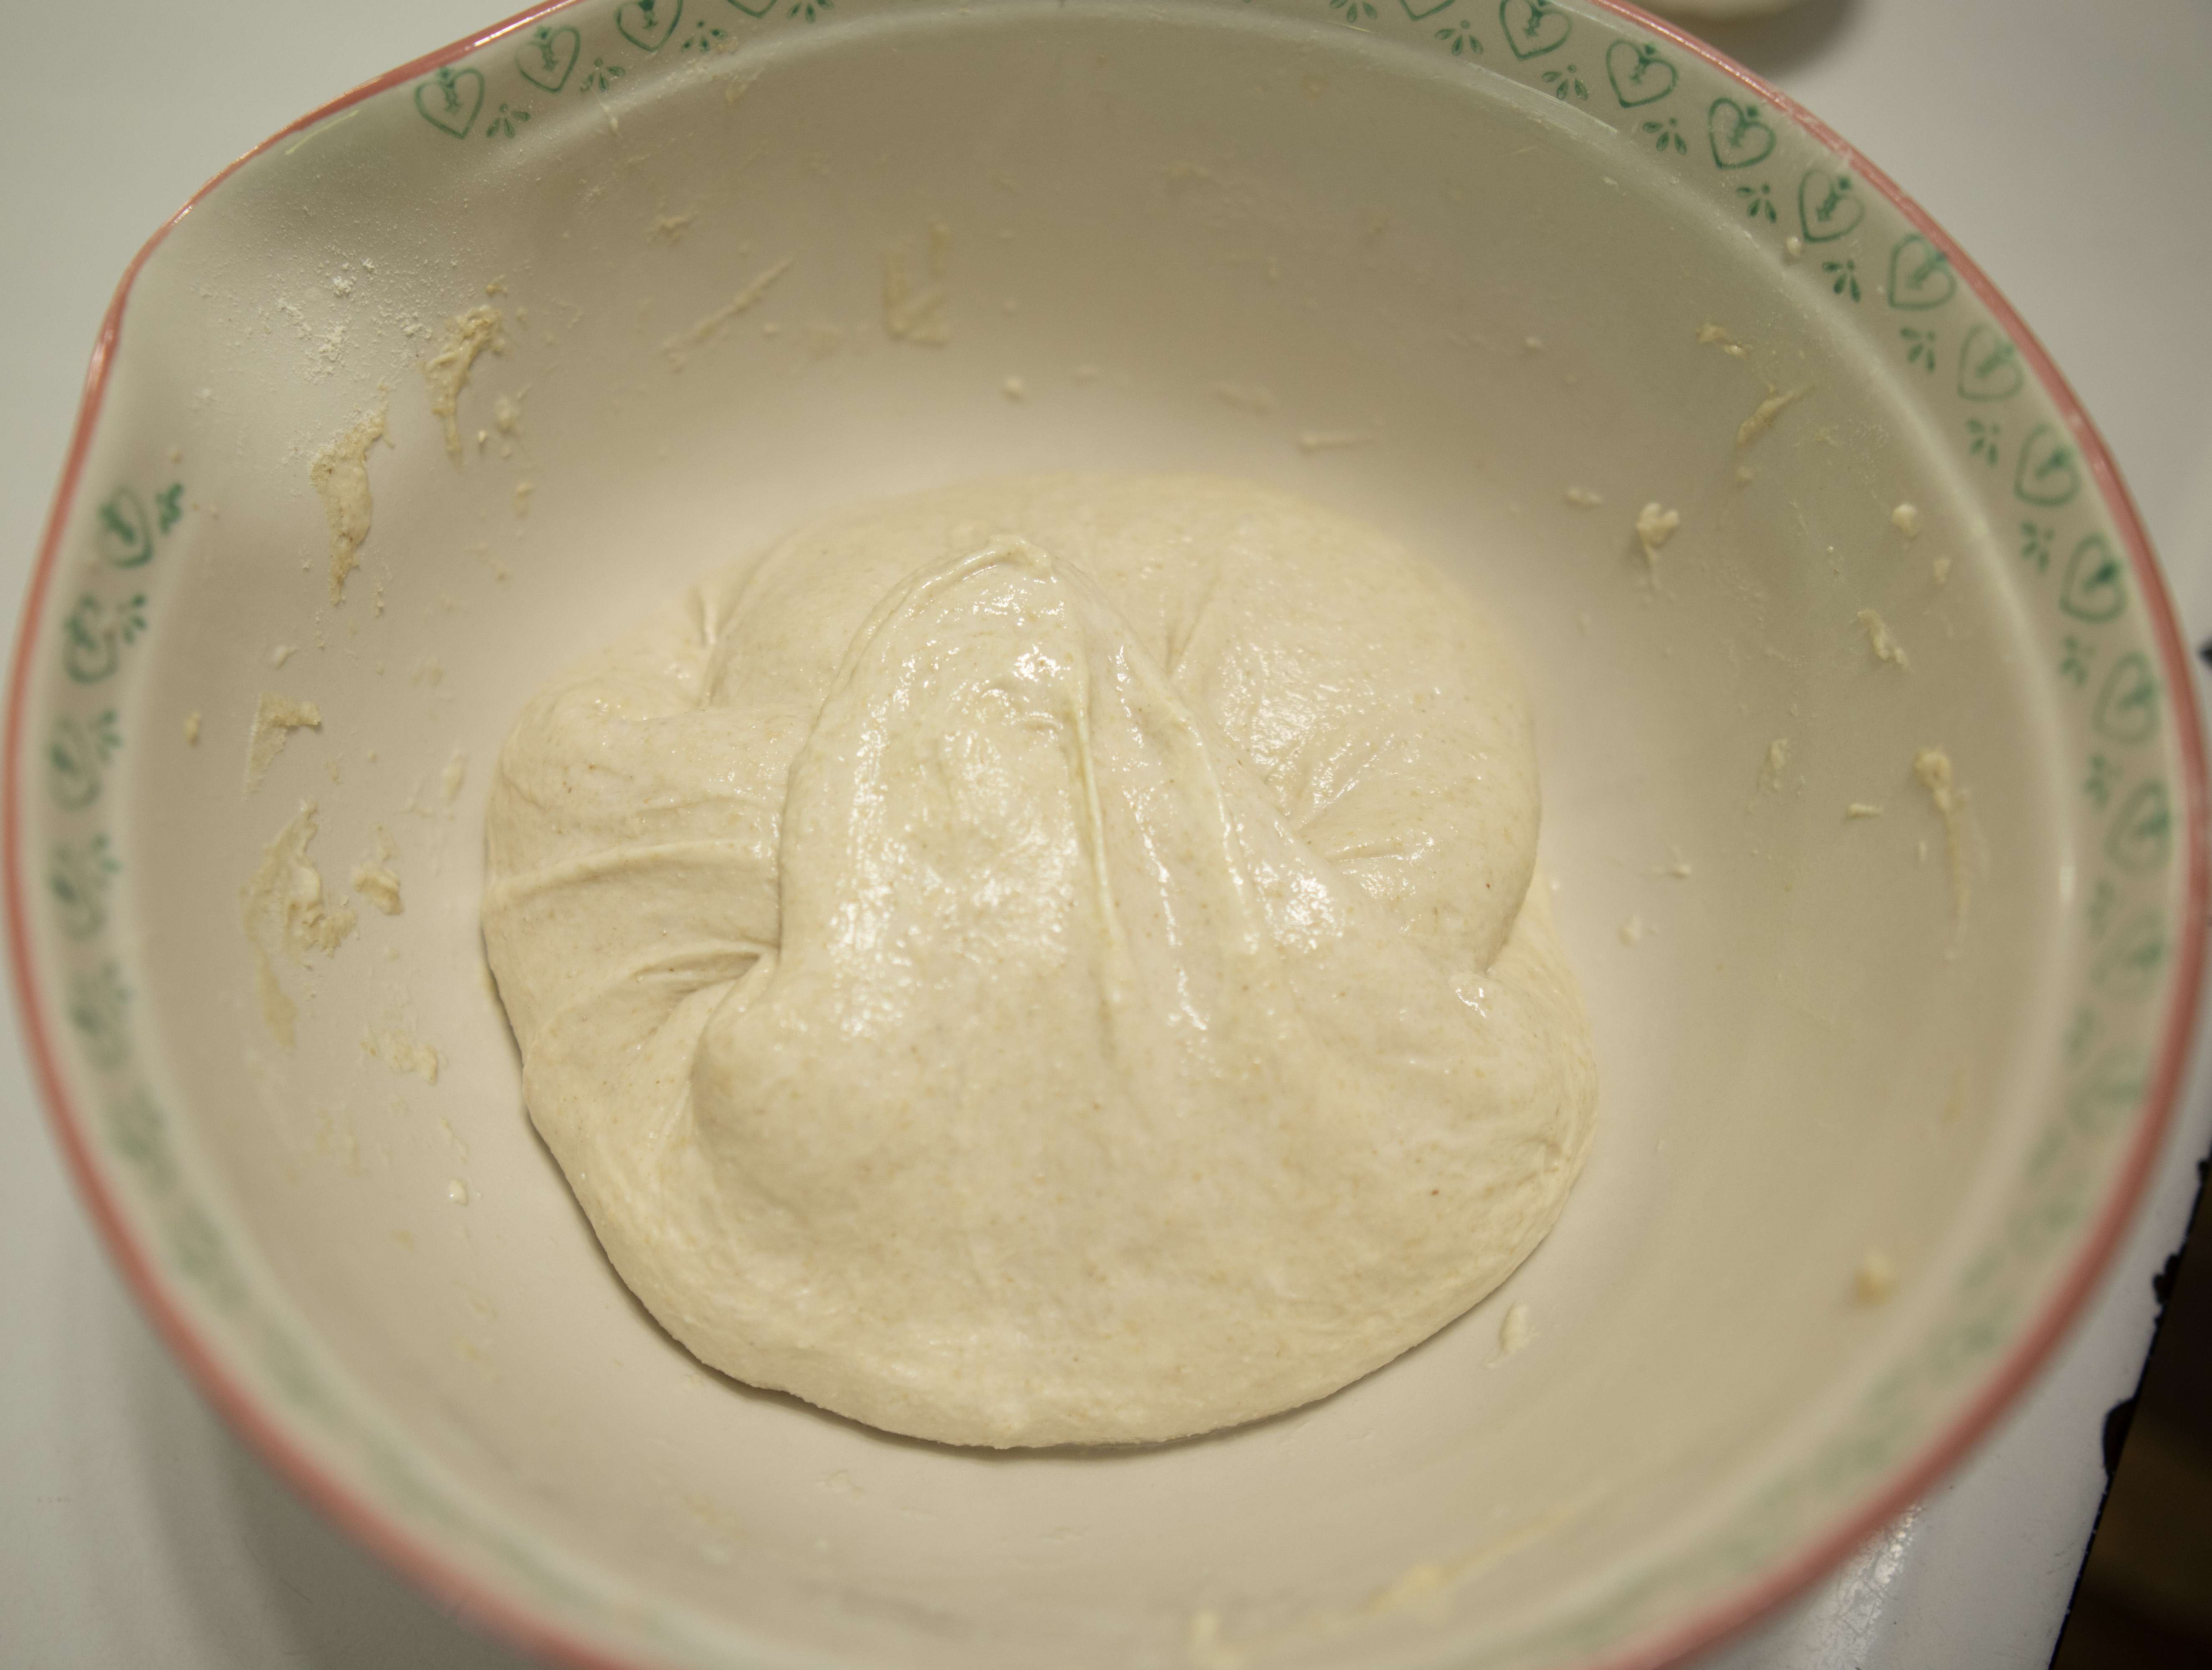
Once you have it all incorporated, cover with plastic wrap or a damp towel and let rest for 15 minutes.
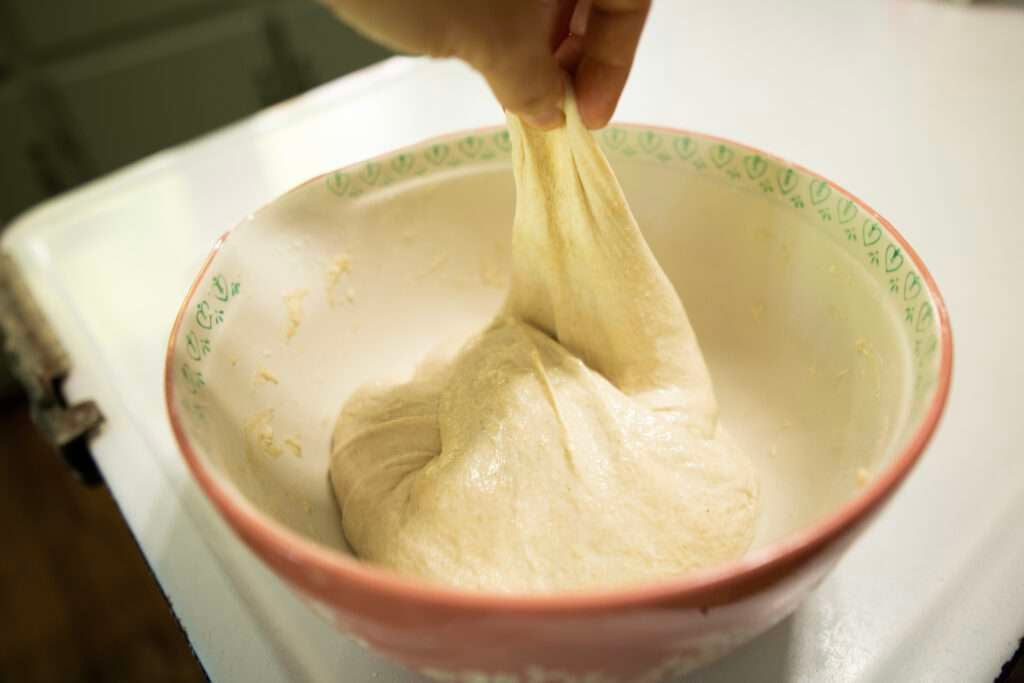
Stretching and Folding
After that 15 minutes, we will start a series of stretching and folding. This process builds gluten and structure in the dough.
We will do this every 15 minutes for the first hour and then every 30 minutes the next hour for a total of 6 series.
Don’t sweat it if you miss one. I do all the time.
But, just try to make it a point to visit the bread dough every little bit for the first 2 hours to perform the stretching and folding.
To perform a stretch and fold, you will take a piece of the dough and lift it up and over the rest of the dough.
Continue to do this until you have worked around the entire bowl.
Bulk Fermentation
Once you are finished with stretching and folding, the dough is ready for the bulk fermentation.
All this means is that the dough will have it’s first rise. This time of fermentation is when the starter does it’s work.
The process of bulk fermentation creates those beautiful bubbles in the dough we all long for in our artisan loaves.
This is the hands off period of making sourdough bread. Set it and forget it!
Allow it to bulk ferment for 4-8 hours.
Final Shape
After this, you will need to shape the dough.
For this, you will need to add a light dusting of flour to your work surface.
Turn the dough onto the floured surface, taking care to not deflate the dough. We want to keep the bubbles that have formed in the dough.
You want to pull all the corners of the dough into itself and turn the dough over.
Pull the dough ball towards you as it drags on the table to build surface tension and close the seam.

Prepare your proofing basket. I like to place a flour sack towel in the banneton basket and flour generously. I like to use rice flour for this application because it doesn’t absorb water as much as all purpose flour.
Flour the top of the dough ball and place dough in the banneton basket top side down. You want the seam side up.
You can pinch the seam closed to help keep the tension on the surface of the dough.
Final Rise
Cover and allow to rise for the second time in a warm place. This will take between 1-2 hours.
However, I suggest placing it in the fridge after it’s in the banneton basket. It will continue to ferment but at a much slower rate.
Having this long cold fermentation makes the loaf a very versatile loaf to make. It also makes it much easier to score before you bake it.
Bake the Bread
When you are ready to bake, heat a dutch oven in the oven to 450 degrees F.
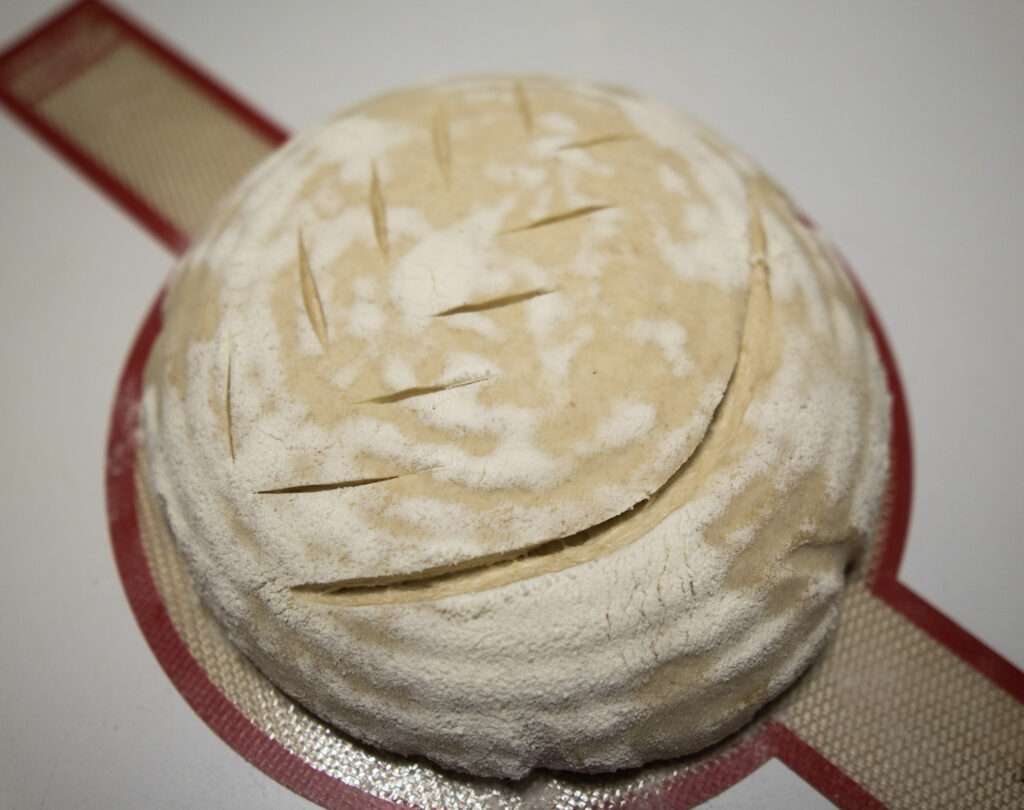
Turn the dough out of the banneton basket onto a piece of parchment paper.
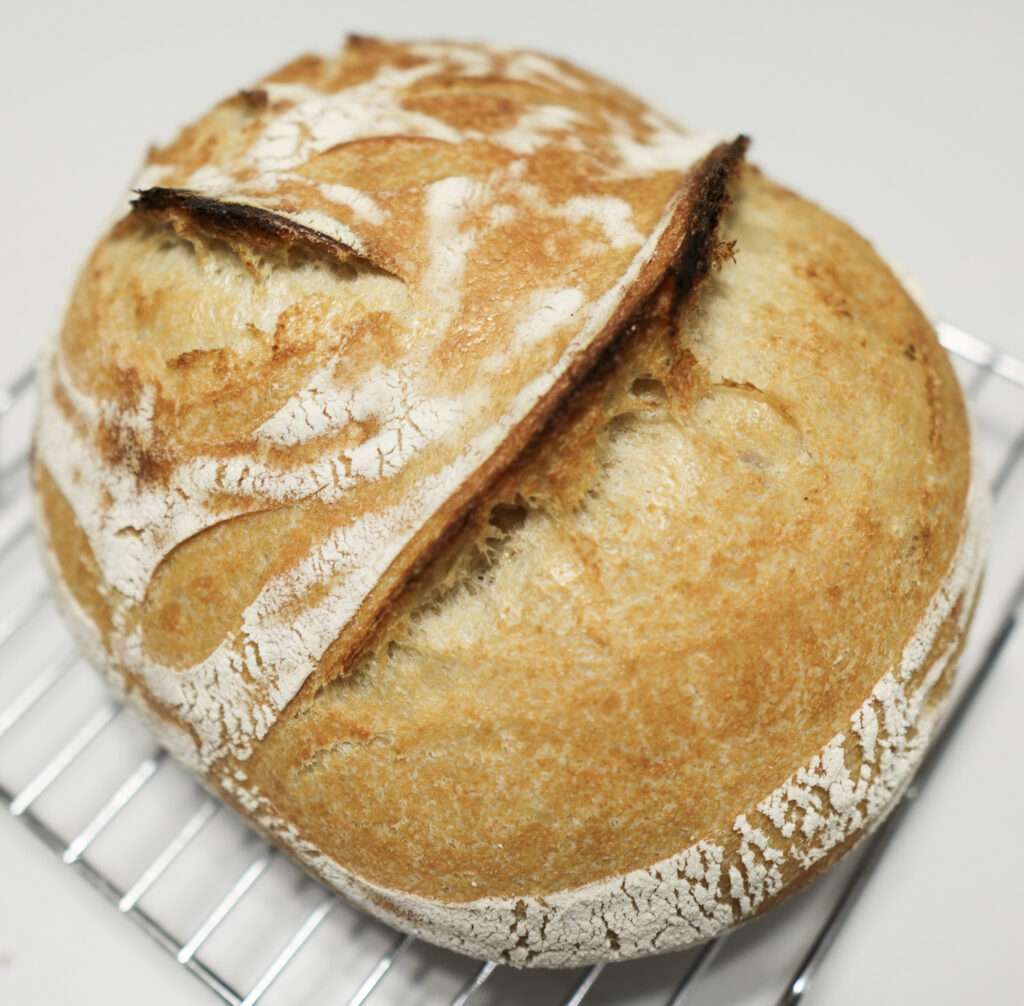
Take a very sharp knife or razor blade to slash the top of the loaf.
This is important because it allows for controlled expansion during the baking process.
If you don’t slash the loaf before baking, it will blow out somewhere and won’t look as nice. But, it will still be delicious!
Take the lid off the hot dutch oven, carefully, and lower the dough using the parchment paper into it. Replace the lid.
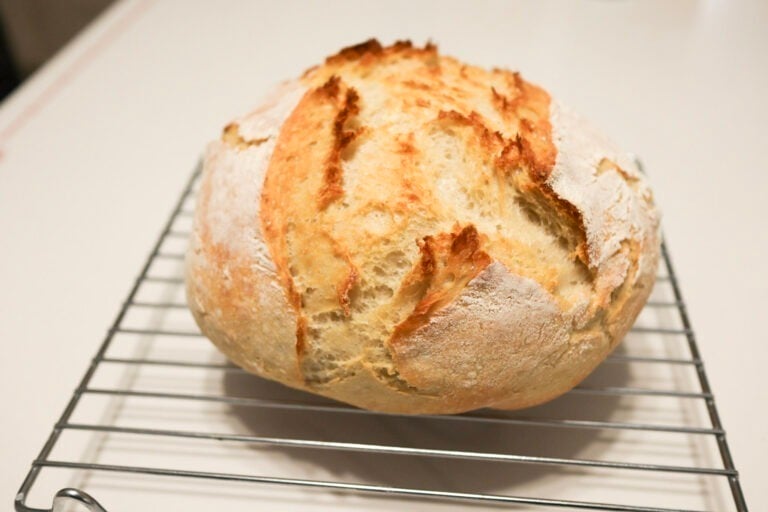
Place back in the oven and bake for 20 minutes. Remove the lid and continue to bake for 15-20 minutes or until deeply golden brown.
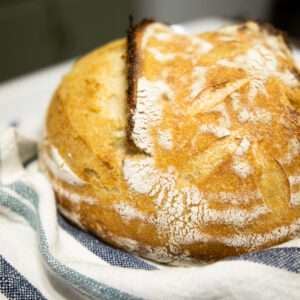
Place the loaf on a cooling rack and allow to cool completely before slicing.
This bread is crusty on the outside and chewy on the inside. It’s the quintessential sourdough loaf of bread.
Storage Tips
Stored cooled loaf in a plastic bag on the counter for up to 3 days.
This loaf can be frozen in a freezer safe bag for up to 3 months.
I would let it sit out for as long as up to 24 hours for the first rise. This will yield a much more sour loaf, however if your starter is on the young side it may take quite a bit longer for the first rise.
Yes, you can make this with fresh milled flour. I do most weeks in my kitchen. A few things to note: First, the final loaf won’t be as fluffy and risen as a whole grain loaf, second, you want to make sure you don’t over ferment as whole grain sourdough loaves will lose their structure much more quickly than all purpose loaves.
You can! Just shape into a loaf shape and put in a prepared loaf pan for the second rise. Bake at 350 degrees F for 35-40 minutes or until the internal temperature is 95-105 degrees F.
Basic Sourdough Artisan Boule
Equipment
- 1 kitchen scale
- 1 Large mixing bowl
Ingredients
- 350 grams unbleached all purpose flour
- 150 grams whole wheat flour
- 325 grams filtered water
- 5 grams salt
- 100 grams active/fed sourdough starter
Instructions
- In a large mixing bowl, add the flour and water. Mix well, cover, and let sit for 30 minutes.
- Add the starter and salt. Mix well until fully incorporated. Cover, let sit for 15 minutes.
- Perform a series of stretching and folding every 15 minutes the first hour and every 30 minutes the second hour.
- After the stretching and folding series are all complete, cover and allow to bulk ferment for 4-8 hours.
- Shape the dough on a lightly floured surface. Do this by pulling the corners of the dough into itself. Turn the dough over and drag across the workstation to build tension and seal the seam.
- Prepare a banneton basket. I place a tea towel in the basket and generously flour it.
- Place the dough, top side down, into the basket. Allow to rise for 1-2 hours, or, place in the fridge and bake the next day.
- Preheat a dutch oven to 450 degrees F.
- Turn the dough onto a piece of parchment paper. Slash the top with a very sharp knife or razor.
- Carefully remove the dutch oven from the oven, remove the lid, and place the dough on the parchment paper into the dutch oven.
- Replace the lid and place in the oven for 20 minutes with the lid on.
- Remove the lid and continue to bake for 15-20 minutes or until deeply golden brown.
- Carefully remove the loaf and place on a cooling rack.
- Allow to cool completely before slicing.


I have been baking loaves for a few months, but have been looking forward to baking an artisan sourdough boule. I’m am planning to start it tomorrow, leave it in fridge overnight to bake next morning! Oh! I hope it turns out really well! I’m excited!
Made this today as my second attempt at sourdough bread. It turned out pretty wonderfully given my lack of experience! During the BF process, my bread kind of got a “crust” to it, making it difficult for the dough to rise up and have bubble under the surface on top. Any idea how to prevent this next time or why it happened?
Thank you!!
Not sure if Mary would tell you to do the same, but I spray a light mist of water over my dough before covering. I also cover mine with a plastic shower cap so it holds the moisture in.
What are the dietary facts in this bread?
I added it to the recipe card. I am actually in the process of adding nutrition facts to all of my recipes. Here are the value per slice when sliced into 12 slices: Serving: 1sliceCalories: 104kcalCarbohydrates: 22gProtein: 3.3gFat: 0.4gSaturated Fat: 0.05gPolyunsaturated Fat: 0.1gMonounsaturated Fat: 0.05gSodium: 98mgPotassium: 50mgFiber: 1.4gSugar: 0.2gCalcium: 6mgIron: 1.1mg
Question: after shaping I put in refrigerator overnight should I let it rise 1-2 hours in morning before baking?
No, you preheat the oven and take the dough out of the fridge just before baking.
can i add cheddar & jalepeno to this? if so, at what stage? TYIA
Yes, I would add them in on the last set of stretch and folds.
I have tried so many different recipes, and every time I attempted it, it was a failure. I was ready to throw in the towel and stick to discard recipes, but I found this one and thought I’d give it one last try. I FINALLY had success!! I will definitely be using this one again and again! I’ll be trying some of your other recipes as well!
Can I use bread flour?
Yes, bread flour would work great.
Hello if I only use bread flour would I use 500 grams of it ?
Yes, it would be 500 grams.