Easy Sourdough Baguette Recipe | Step-By-Step How To
This sourdough baguette recipe is easy to make and doesn’t require any special tools or equipment. Crispy on the outside and chewy on the inside, these make the perfect compliment to most any meal.
*This post contains affiliate links meaning I may make a small commission on sales at no extra cost to you*
When I first started on my sourdough journey I focused entirely on sourdough bread.
As I became more confident in my sourdough baking, I branched out to other recipes that were a bit more difficult.

Recently, I made sourdough ciabatta rolls, Sourdough Ciabatta Recipe after being intimidated for years to make them.
I found out they were actually quite simple.
This sourdough baguette recipe is quite similar to the ciabatta recipe.
The biggest difference is in the shaping of the dough.
If you are brand new to sourdough, start here: How to make a Sourdough Starter
What is Active Sourdough Starter?
Active or ripe sourdough starter is starter that has been fed within the last 24 hours and is bubbly and active.
What is Sourdough Discard?
Sourdough discard is starter that has not been fed within the last 24 hours and may have a liquid on top and an acetone smell.

Why you will love these Sourdough Baguettes
This recipe uses only a few simple ingredients.
Simple and quite fun to make, these baguettes are the perfect side dish to almost any meal.

What you will need to make this Sourdough Baguette Recipe
Flour
I prefer to use a combination of freshly milled flour and all purpose flour. You can use bread flour, all purpose flour entirely, or all freshly milled. Keep in mind using 100% freshly milled will yield a baguette that is a bit more heavy and dense.
This is the grain mill I have used for years: Nutrimill Classic Grain Mill
Water
For best results, use filtered water. Tap water often contains chlorine and other additives that could inhibit the fermentation process.
Sourdough Starter
Use active starter for the best results. While you can use sourdough discard, it may take longer to rise.
Salt
I prefer to use Redmond’s Real Salt for it’s mild flavor in my baking. Any good quality sea salt will work just fine.
For complete ingredient amounts, see recipe card below.

Tools you may need for making sourdough baguettes
Baguette Pan (optional)
Though a baguette pan will make this process easier, you don’t have to have one. I don’t own one and still make baguettes that turn out really well.
Here is a good quality baguette pan: Baguette Pan
Dough Cloth
You may also choose to use a dough cloth for rising. I have one of these and they work quite well. Dough Rising Cloth

Step by Step Instructions for making Sourdough Baguettes
Mixing the dough
The evening or the morning before you want to make these, add the water and sourdough starter to a large mixing bowl. Mix until cloudy.
Add 3 cups of flour and mix with a dough whisk.
At this point, add the salt.
Continue adding just enough flour to make a shaggy dough that is not too wet but no dry. This dough is a higher hydration dough and should be quite shaggy.
Cover with plastic wrap and let the dough rest for 30 minutes.

Stretching and Folding
Come back to the bowl and perform a stretch and fold. This just means lifting the dough and turning it onto itself and then make a quarter turn and repeat until you turn the bowl 4 times. This builds dough strength and helps create the large bubbles in the finished baguettes.
The best way I have found to do this is to use wet hands. I keep a small bowl of water nearby and wet my hands in between stretching the dough.
Do this every 30 minutes at least 3 times.
Bulk Fermentation
After the last stretch and fold, cover the bowl with plastic wrap and let the dough ferment. This is the bulk fermentation.
If making the evening before, allow to ferment at room temperature overnight.
If making in the same day, allow to ferment for at least 4 hours.

Shaping the dough
The next morning or after the dough has risen, turn it onto a lightly floured surface.
Try not to deflate the dough as much as possible. Add a little flour to your hands while working with the dough.
Divide the dough into 3 equal parts.
Shape the baguette dough by rolling it into a log that is approximately 10 inches long.
Repeat for each piece of dough.

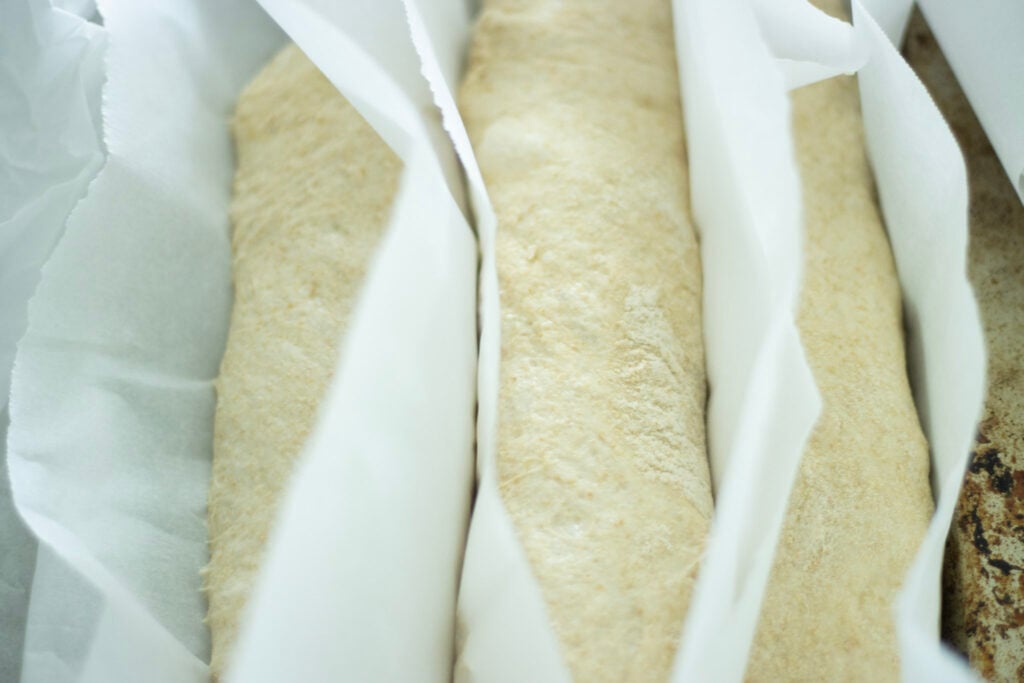
Place a piece of parchment paper on a baking sheet. Take another piece of parchment paper and cut it in half.
Crumple up each piece and stuff between the shaped baguettes. This will help them hold their shape while rising for the second time.
Of course, if you have a baguette pan that will work even better.
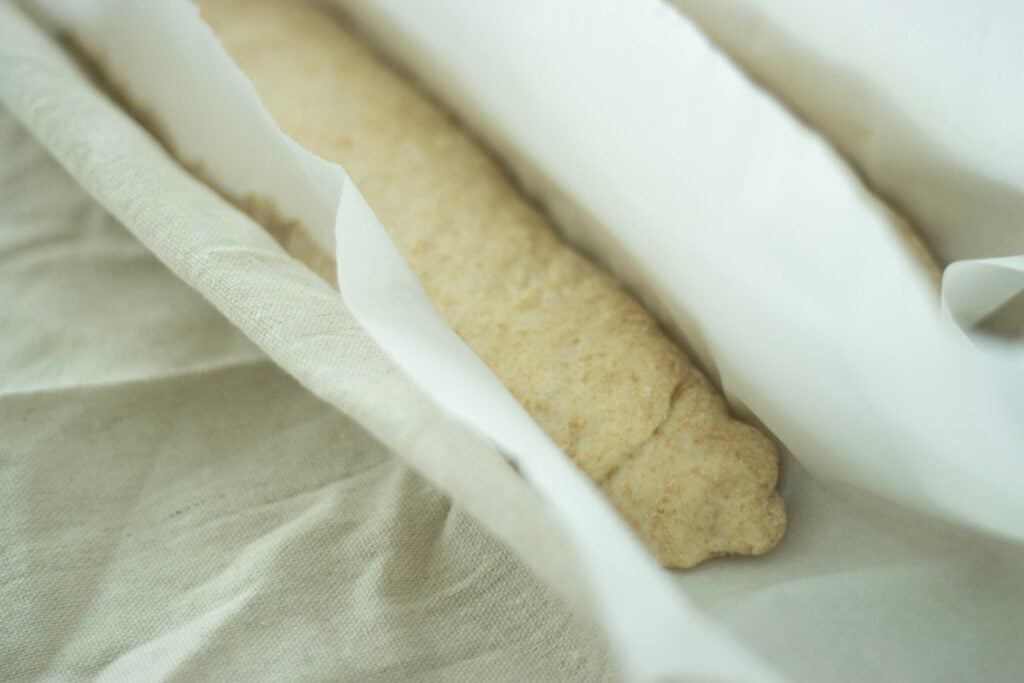
Another alternative is to use a dough cloth. This is a linen cloth that is used to make baguettes. It’s a stiff fabric that you can bunch up in between the baguettes. Dough Rising Cloth
Cover the baguettes with plastic wrap or a kitchen towel and allow to rise for 1-2 hours.
Preheat the oven with a pizza stone or baking stone inside to 475 degrees F.
Place a cast iron pot on the bottom rack as well during the preheating time.

After the oven has preheated carefully remove the baking stone or pizza stone. Slice the tops 3 times diagonally with a sharp knife or razor blade.
Slide the baguettes onto the baking vessel and place in oven.
Put several ice cubes in the cast iron pot to create steam and quickly close the oven door. This will make for a crunchy crust and airy crumb.
Bake for 15 minutes, remove the cast iron pot and allow to bake an additional 5-10 minutes or until golden brown.
Allow baguettes to cool on a wire rack.

Storage Tips
Store baguettes in a plastic bag or airtight container at room temperature for up to 3 days.
Baguettes store wonderfully in the freezer in a freezer safe bag for up to 3 months.
As you can see, the home baker can make french baguettes pretty easily. This type of recipe will really impress your family and friends!

Sourdough Baguettes
With a crispy crust and chewy crumb, these sourdough baguettes are a perfect pairing for almost any meal!
Ingredients
- 1 1/4 cup water
- 1/2 cup sourdough starter
- 1 1/2 tsp salt
- 3-4 cups flour
Instructions
- In a large bowl add the water and sourdough starter. Mix until cloudy.
- Add salt and 3 cups flour.
- Mix well and continue adding just enough flour to make a shaggy dough that is not too wet but not dry.
- The amount of flour you use will depend on the humidity of your kitchen. The goal is to have a dough that is workable but still sticky.
- Cover and allow the dough to rest for 30 minutes.
- Come back to the dough and perform a series of stretch and folds.
- This is when you pick up a corner of the dough and stretch it up and turn it back on itself.
- Using wet hands makes this a much easier process.
- Turn the bowl a quarter turn between stretch and folds until you have went around 4 times.
- Cover and let rest another 30 minutes.
- Aim to do at least 3 stretch and folds.
- After the last stretch and fold, cover the bowl and allow to rise for 4-12 hours.
- Turn the risen dough onto a lightly floured surface.
- Divide into 3 equal parts.
- Shape each piece into a log that is approximately 10 inches long.
- Place on a piece of parchment paper.
- Take another piece of parchment paper and cut in half. Crumple each piece and place in between the baguettes to help them hold their shape.
- You may also use a baguette pan which will make the process much easier.
- Another alternative is to use a dough cloth and make a wrinkle in between each baguette to help them hold their shape as well.
- Cover with a towel and allow to rise for 1-2 hours.
- Preheat oven to 475 degrees F with baking stone or pizza stone inside as well as a cast iron pot on the bottom rack.
- Make 3 slashes diagonally across the dough with a sharp knife or razor blade.
- When preheated carefully remove the baking vessel and slide the parchment paper with the baguettes onto it.
- Place in the oven and put several ice cubes in the cast iron pot.
- Close the door quickly
- Bake for 15 minutes. Remove the cast iron pot and bake an additional 5-10 minutes or until golden brown.
- Allow to cool on a cooling rack.
Notes
These baguettes store well on the counter in a plastic bag for up to 3 days.
They also freeze great in a a freezer safe bag for up to 3 months.
Nutrition Information
Yield 36 Serving Size 1Amount Per Serving Calories 158Total Fat 0gSaturated Fat 0gTrans Fat 0gUnsaturated Fat 0gCholesterol 0mgSodium 98mgCarbohydrates 33gFiber 1gSugar 0gProtein 5g
This website provides recipes and calculates the nutritional value to best of our ability. There may be slight variations in nutritional value based upon the alternative ingredients you may have on hand to use.


