How to Pressure Can Green Beans (Easy Raw Pack Way)
In my opinion, green beans are perfect for preserving! This method for pressure canning green beans is easy and straight forward.
This post contains affiliate links. I may make a small commission on sales at no extra cost to you. As an amazon associate, I make commissions on qualifying purchases
If you grow your own garden and your own food, it’s so important to learn the proper ways to safely preserve the harvest.
Green beans are low-acid foods, therefore the safe way to preserve them is to use a pressure cooker. And, thankfully in our modern times, canners are safe to use and have many safe guards in place.
In this step-by-step tutorial, I am going to not only show you how to preserve green beans, but also give you all the tips and tricks to safely use a pressure canner!
Before you know it, you will be a master food preserver!
Why I love pressure canning green beans
Green beans are one of the easiest vegetables to preserve.
They are a great place to start as it gives you confidence to move on to other foods like meat, potatoes, and the like.
Using a raw pack method makes this process super easy and relatively quick to do.
I prefer home canned green beans over store bought anytime! They have more flavor than those from the grocery store and knowing we grew our own green beans and have them on the shelf for the winter is so rewarding.
Whats the difference between pressure canning and water bath canning?
Pressure canning is for low-acid foods like most vegetables, soups, and meat. The process uses a pressure canner that comes to pressure to super heat the jars.
Water bath canning is for high-acid foods like fruit or anything with vinegar in it. The process uses a big pot of boiling water you lower the jars into to heat them. You can purchase a dedicated water bath canner.
If you are looking for a great recipe that uses a boiling water canner, TRY MY COWBOY CANDY RECIPE

What you will need to home-canned green beans
Pressure Canner – There are so many pressure canners available. I use a PRESTO PRESSURE CANNER
Canning Supplies – You will need a few special tools for canning, such as a funnel, a jar lifter, etc. My advice is to purchase a CANNING SUPPLY STARTER KIT, which is what I did early on. They are inexpensive and will last a very long time. Each canning tool makes the job easier, so a kit is preferred.
Mason Jars – You can decide the size that suits your needs, quart or pint.
Canning lids – It is IMPERATIVE you use new lids every time you can.
Fresh Green Beans – You want freshly picked green beans for the best results.
Filtered water
Salt
Step-step directions for Pressure Canning Green Beans
If you are a beginner canner, green beans are a great place to start as they are one of the easiest to can since the use the cold pack method.
Prepare the Beans
The first thing you need to do is string and snap your beans. My husband and I love to do this together on the front porch and just talk about this and that while we get some work done.
Remove the yellow beans and save them for seed for next year!
Sterilize jars and lids
When I am preparing to do the canning the first thing I do is put the lids in a small pot of hot water and bring up to a simmer to sterilize them. Similarly, I put my freshly washed jars in an over set to 180 degrees F until I am ready for them.
Make sure all your tools are freshly washed in hot soapy water.
Study the manual that came with your Canner
DO NOT BYPASS THIS! Spend some time reading and then reading again the manual that came with your pressure canner.
If used properly, they are very safe. With several safe guards in place and by following the instructions, you will have a pleasant experience pressuring canning.
My manual instructs me to add 3 quarts of hot water to my canner prior to putting the jars in. Yours may vary.
I also study my ball canning book to make sure I follow the safe method.

Boil the water
I also get an ELECTRIC KETTLE of water up to a boil. The amount of water you use will depend on how many jars you will be canning.
You don’t want to fill the jars with cold water. If you don’t have a kettle, boil water in a pot on the stove while packing the jars.
Once all of my tools are ready, I rinse my beans under cool water thoroughly.
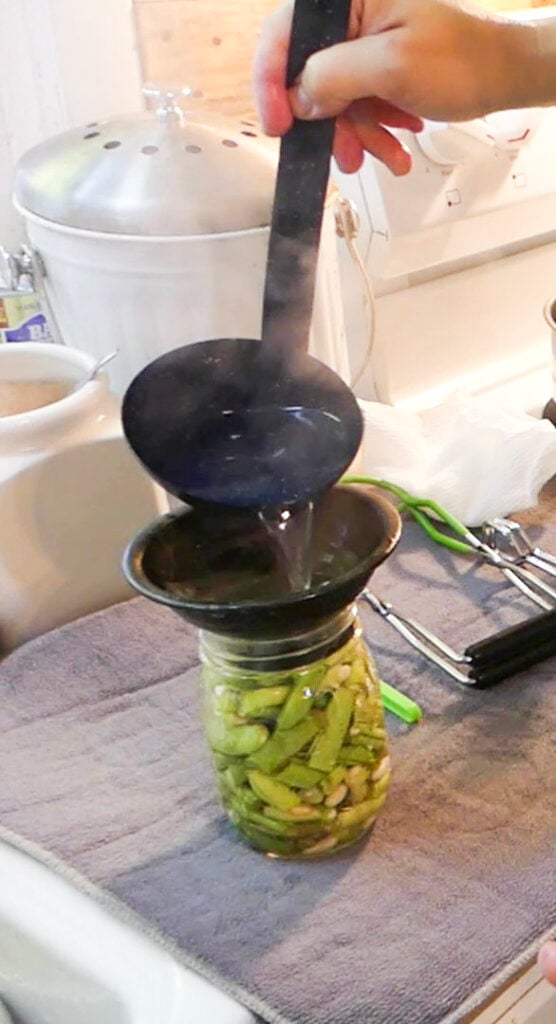
Fill the jars
One by one, I take the hot jars out with my tongs. With the funnel in place, I add the raw beans, packing them tightly and leaving a 1-inch headspace.
You want enough beans to fill the jar but not stick above the rim.

I then add 1/2 tsp of salt for pint jars, or 1 tsp for quart jars.
Next, I ladle the boiling water over the green beans leaving 1/2 inch head space. Also, I take a chop stick and remove any air bubbles in the jar.
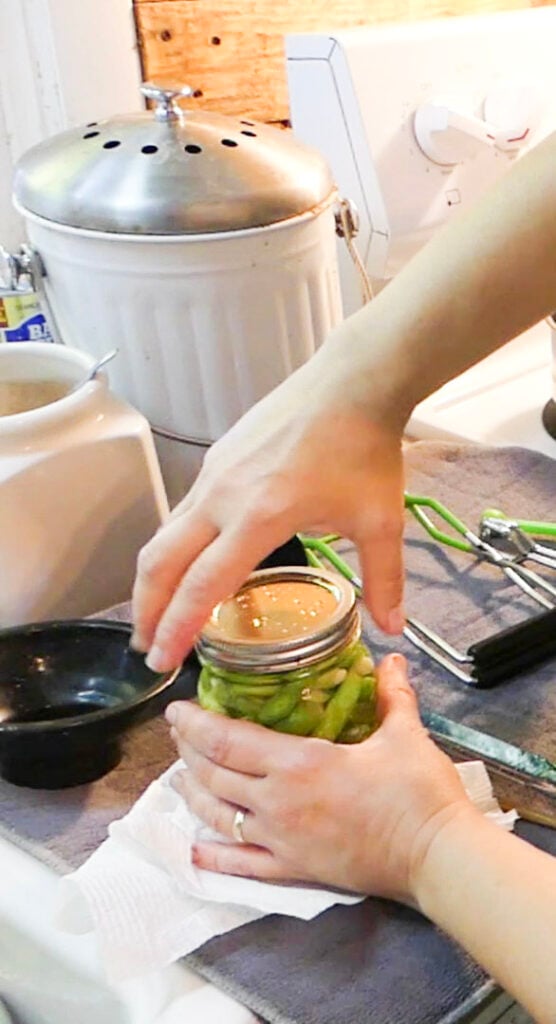
Clean the jar rims
I wipe the jars with a clean cloth and rub my finger along the rim to make sure it feels smooth. Using the magnet, I take a lid and place on the jar and then the band.
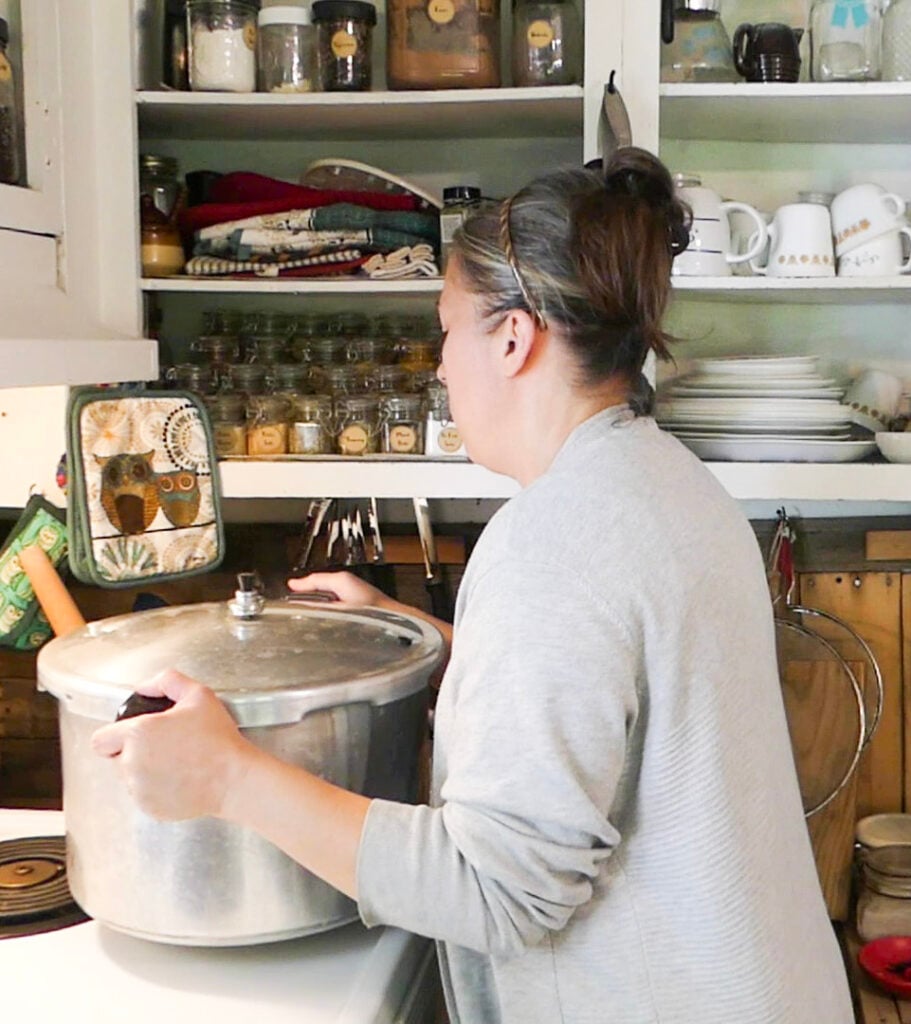
Place jars in Canner
Place the jar in the prepared pressure canner and proceed with the rest of the jars.
Inspect canner lid (IMPORTANT)
When I am finished filling all the jars and have them in the canner, I inspect my lid. There is a hole in the valve that you need to look through to make sure it is clear before you proceed.
Also, I check my gasket to make sure it is soft and there are no cracks. The rubber stopper also needs to be in place.
This is a safety feature on my canner and it will not come to pressure without it in place.

Vent the canner
Place pressure canner on the largest burner on your stove.
Put the lid on the canner and turn the burner to a pretty high temp. After a few minutes, the valve will start spewing steam.
Once it starts, I set a timer for 10 minutes to allow the canner to vent. I adjust the temp to make sure it’s a steady steam.
Start the pressure
After the 10 minutes, it’s time to put the weighted gauge on. My weight goes over the valve. I adjust the temp again to almost high until the weight starts to jiggle and the canner seals.
Note: A lot of canners have a pressure gauge with numbers on it. They all work the same way.

As soon as it starts to jiggle, I set my timer for 20 minutes for pints, 25 minutes for quarts. I will adjust the temp periodically to make sure the weight isn’t jiggling too fast. You want a slow, steady jingle.
Let the canner rest and naturally release pressure
After the allotted time, I move my canner to cool burner and let it alone until the pressure falls naturally.
NEVER ATTEMPT TO FORCE THE CANNER TO DROP PRESSURE!!!! THIS CAN BE VERY DANGEROUS!!
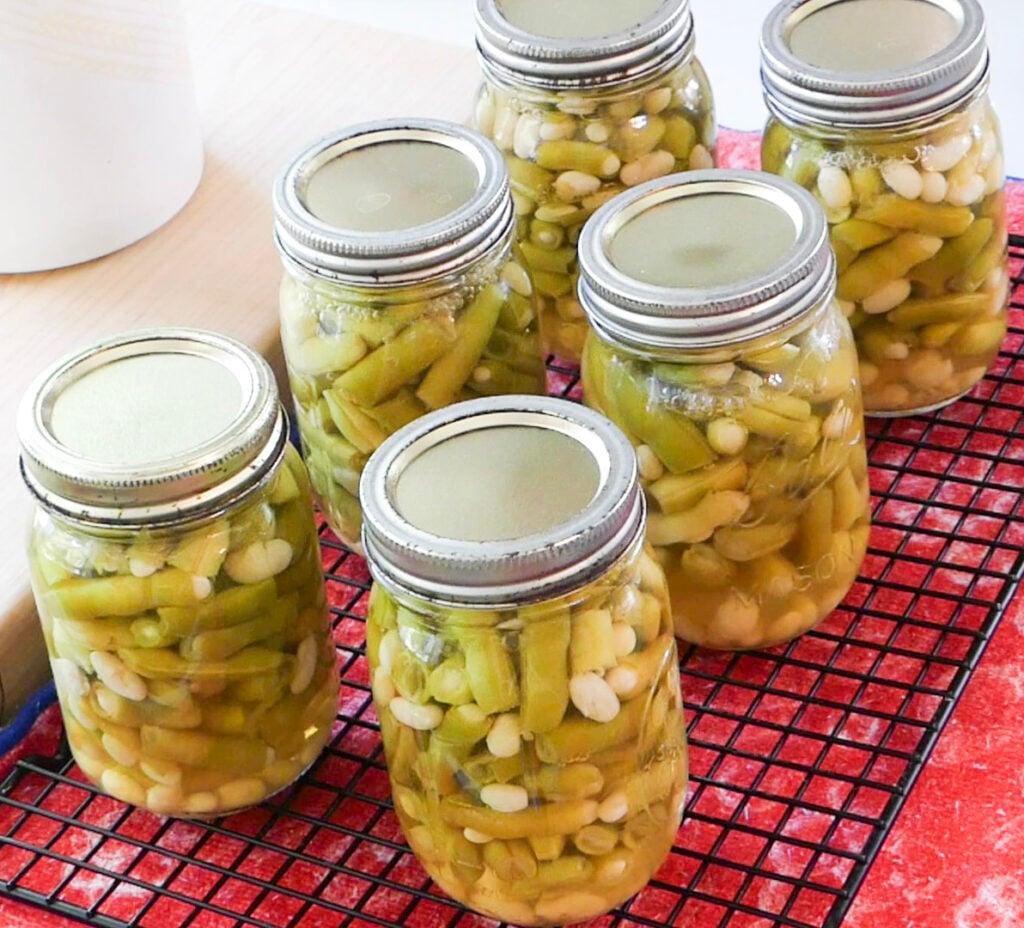
Remove Jars
After the canner’s pressure has dropped to zero, you can remove the weight and then the lid. Using a jar lifter, carefully move the jars of green beans to a cooling rack.
Allow to sit for 24 hours at room temperature and check for a good seal. Label and remove bands. Store in a cool, dry place.
Note: If any jars do not seal, place them in the fridge and consume within a week.
Please leave a comment down below and tell me your favorite thing to preserve!


