How to Make a Gluten Free Sourdough Starter
Did you know even if you eat a gluten-free diet you can have sourdough? Learn how to make a gluten free sourdough starter recipe and make the bread products you crave! Made with just flour and water, you can have an active starter in just7-10 days! (Mine took 5!)
A gluten free sourdough starter is made in the same way as a traditional starter except that it uses gluten-free flour making it perfect for those who practice a special diet.
This post contains affiliate links. I may make a small commission on sales at no extra cost to you. As an Amazon Associate, I make commissions on qualifying sales
What is a Gluten-Free Sourdough Starter?
A gluten free sourdough starter is a sourdough starter made with gluten-free flour. It ferments much like a traditional starter and builds wild yeast and beneficial lactic acid bacteria.
The starter can be used to make gluten free sourdough goodies just like a normal starter. Making your own gluten-free sourdough starter is very straight forward and uses only 2 ingredients.
If you or someone you know has celiac disease, a gluten free starter will be a game changer!
Benefits of this type of sourdough starter
Improved Flavor
Sourdough starter adds a bit of a tang to your baked goods making it perfect for any bread product you want to make with gluten-free flour.
Better Texture
Bread made with a sourdough starter has a wonderful texture. It is soft yet hearty and holds up well to any toppings you desire.
Natural Rise (No conventional yeast needed!)
When you make your bread products with active sourdough starter, the bread rises naturally without the need for commercial yeast. This natural rise creates beneficial bacteria in the bread for easier digestion.
Tools you may need for this project
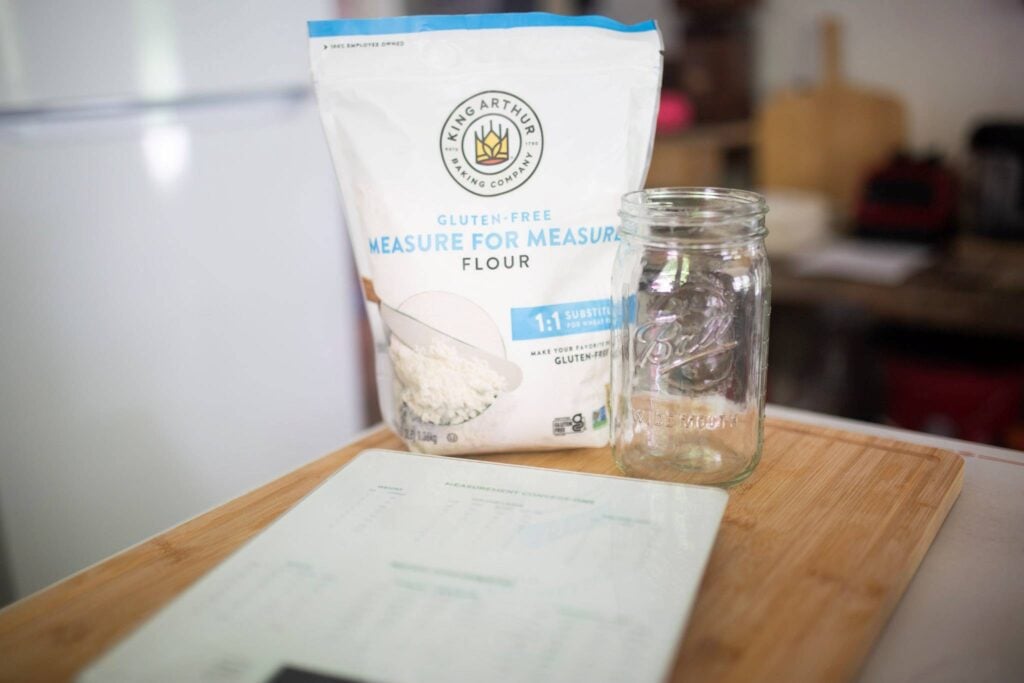
A wide mouth MASON JAR works great for making a sourdough starter.
The best lid I have found for any fermentation project is a PICKLE PIPE
My favorite flour to use is KING ARTHUR 1:1 GLUTEN FREE FLOUR
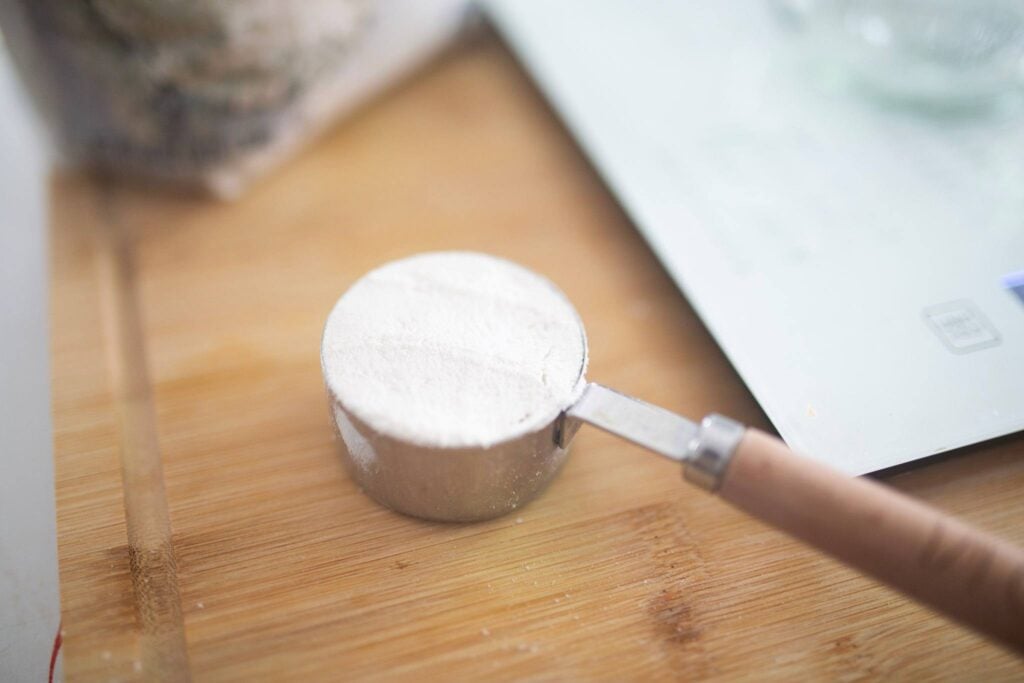
Although it is not required, a KITCHEN SCALE is great for ensuring the perfect texture.
Ingredients you will need
- Gluten Free Flour – I used KING ARTHUR GLUTEN FREE FLOUR for this starter.
- Filtered Water – For best results, use filtered water for your sourdough starter. Tap water typically has chlorine which can inhibit yeast growth in a starter. Distilled water is not recommended due to the lack of minerals.
How to make the starter (Step-by-Step)
Day 1
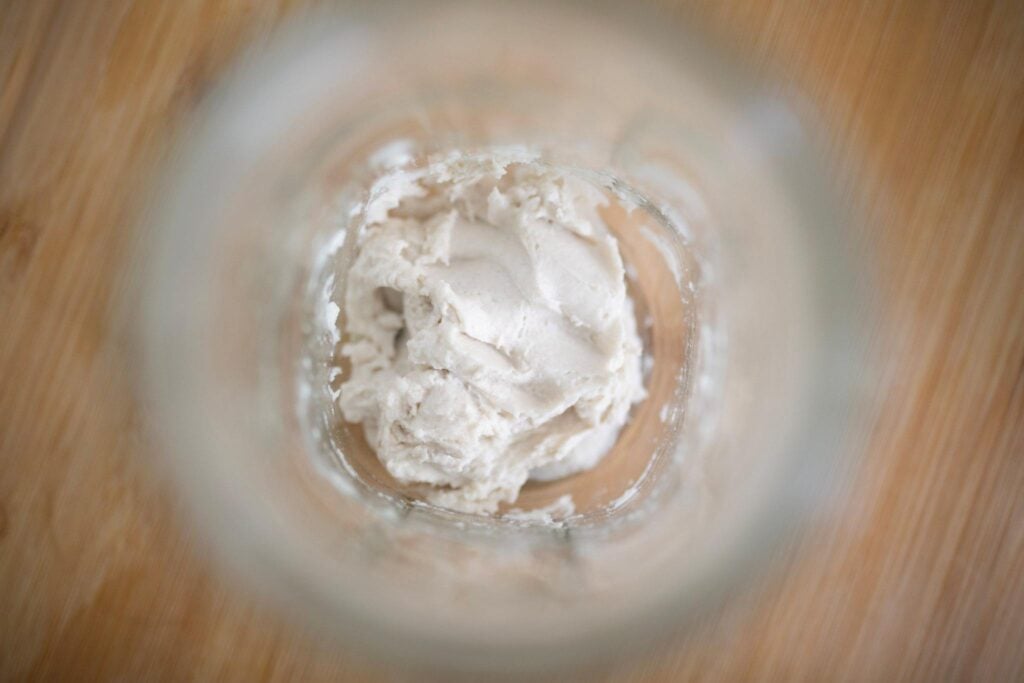
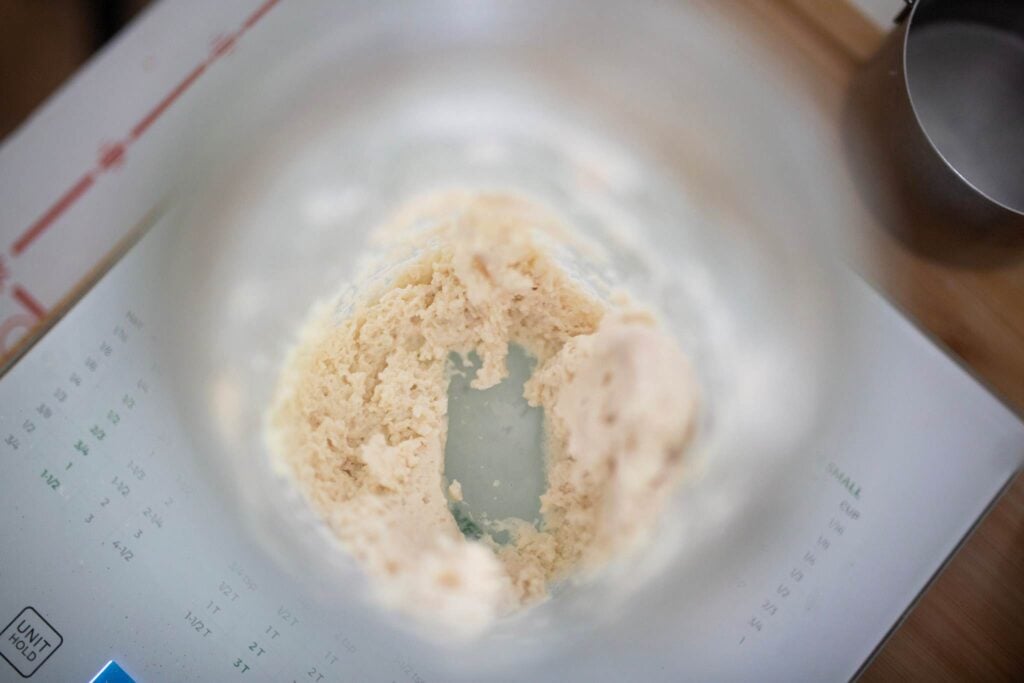
In a wide mouth mason jar, (make sure it’s a clean jar) add 1/4 cup of flour (37 grams) and just less than 1/4 cup of water (37 grams). Mix very well until no dry bits of flour remain.
Note: This starter is on the thick side. I have found activity to be much higher with this thickness in gluten-free starters
Place a loose-fitting lid or pickle pipe on top of the jar and sit in a dark place. Let the starter ferment for 24-36 hours. Try to find a warm place for your starter to ferment.
You can also use a coffee filter held on the jar with a rubber band.
Day 2
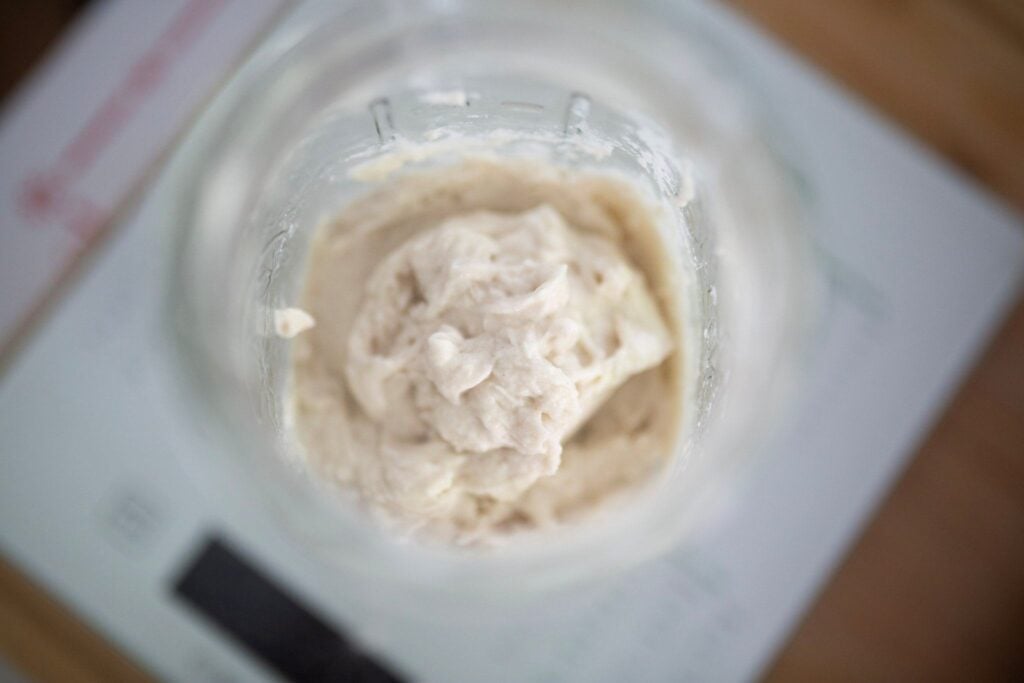
On day 2, for the next feeding, you will repeat the feeding from day one. Add 37 grams flour and 37 grams water to the jar.
Mix until well combined, loosely cover and let ferment in a dark place another 24-36 hours.
Day 3
The next day (day 3), we will increase the flour to 1/2 cup or 71 grams and 71 grams of water (just under 1/2 cup).
Again, mix until well combined, cover, and let sit for 24-36 hours.
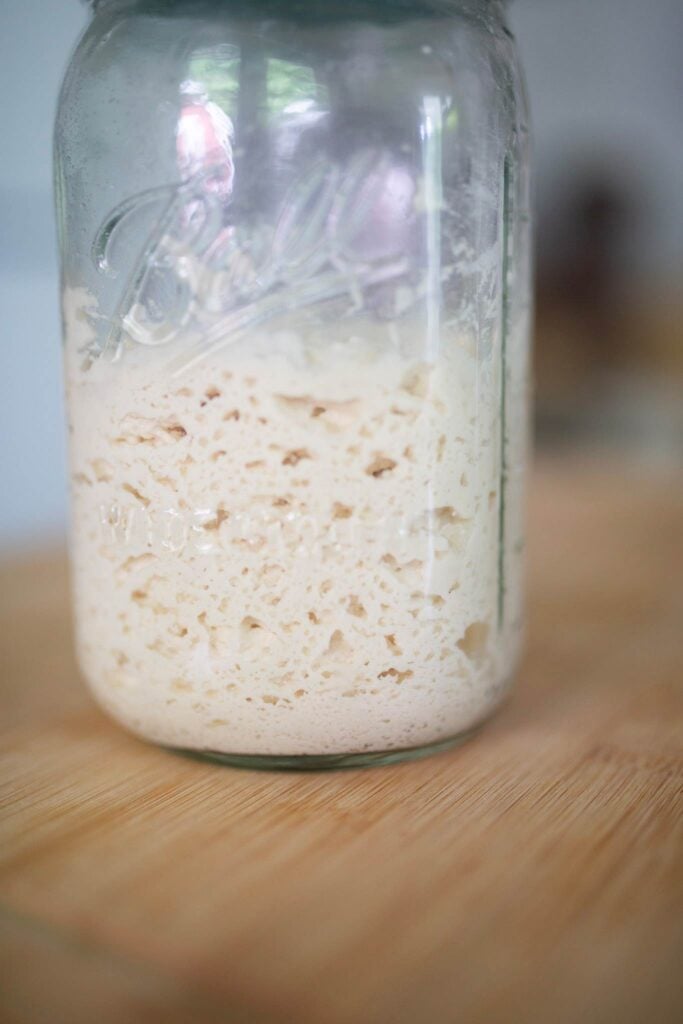
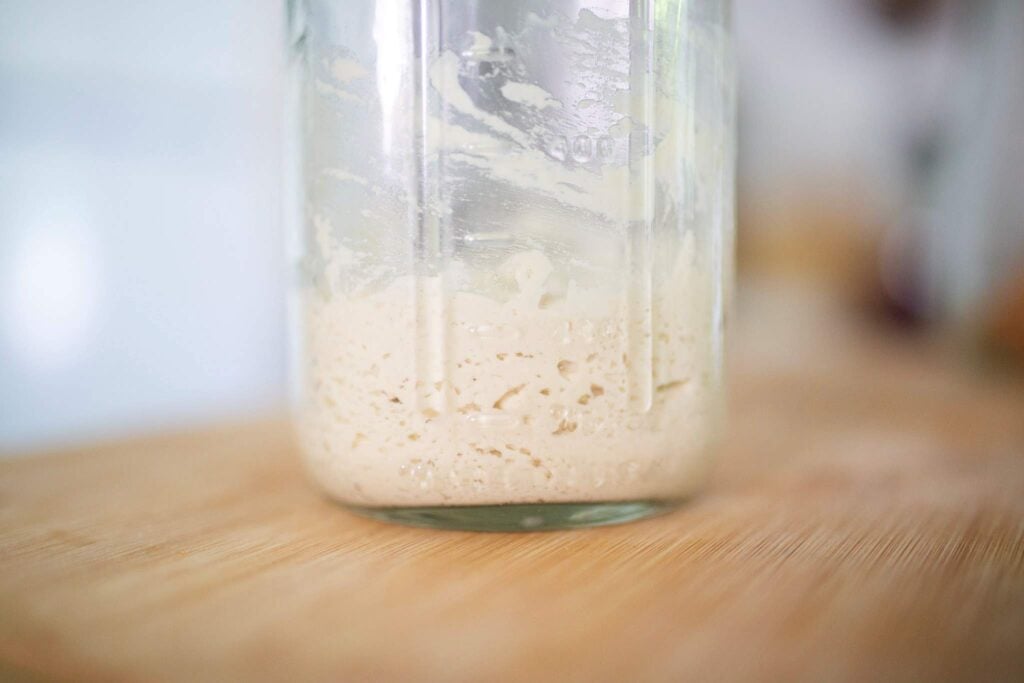
By day 3, you should start to see bubbles in the starter and notice it has risen in the jar.
Day 4
Before you feed the starter on day 4, you will need to discard a portion of the starter, at least 1/2 prior to this feeding. We do this because you need enough food the feed a small amount of starter to build strength in the starter.
A note of what to do with this discarded starter – Since the bacteria and yeast may not be at the optimum levels, using this discarded starter early in the process could cause tummy upset. I suggest mixing the discarded starter with a gallon of water until milky and watering your flowers or garden with the starter (the plants love it!). Alternatively, you can feed it to the birds.
After discarding, feed the starter 71 grams flour and 71 grams water. Mix well and let ferment covered loosely for 24-36 hours.

Days 5-7
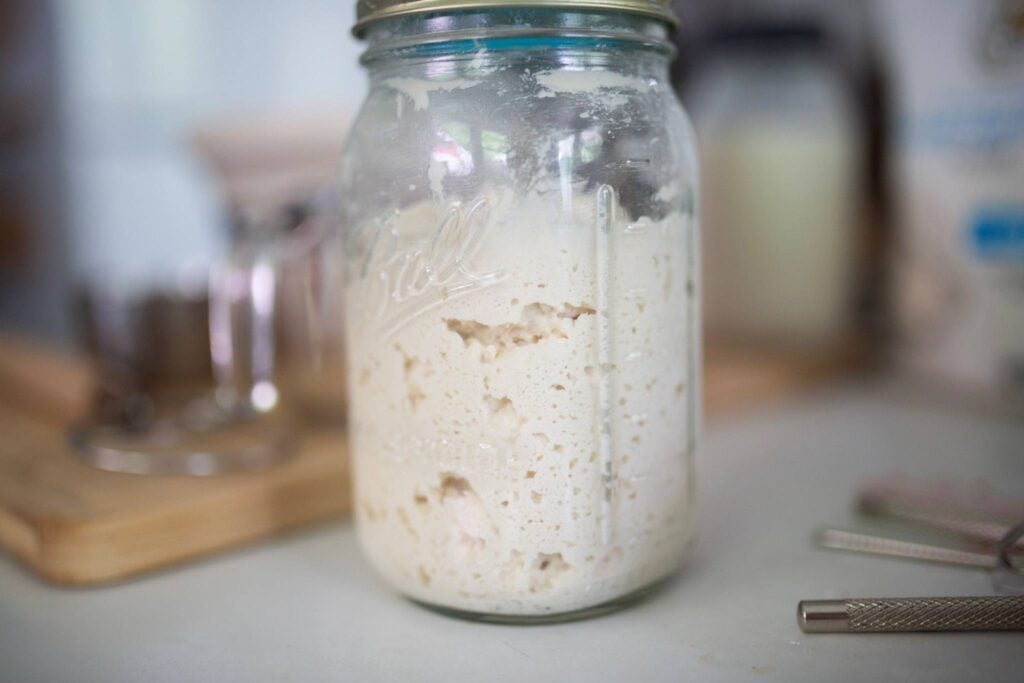
On day 5, if you notice the starter is very bubbly and active from day 4, feed the starter 1 cup flour (161 grams) and 3/4 cup water (182 grams).
NOTE: You can notice the sides of the jar to see if the starter rose up in the jar
Mix very well and cover lightly. Let ferment for 10-12 hours.
If your starter is very bubbly and has risen in the jar noticeably, move the starter the fridge and start using in your recipes!
NOTE: If you do not notice activity on day 5 after 10-12 hours, discard at least half of the starter and feed again. In my experience, you should have significant activity on day 5. You can continue this discard and feed until you see activity and then move the starter to the fridge.
How to know your starter is ready to use
- Activity – An established starter will rise and fall in the jar reliably and consistently.
- Smell Test – When bubbly and risen, the starter should have a pleasant, yeasty smell.
- Bubbling – An active starter will be very bubbly in the jar.
Common Problems with a Gluten-Free Sourdough Starter
Starter has a liquid on top
This liquid is a normal by-product of the fermentation process and is called “hooch”. Just stir the liquid into the starter. It has a lot of yeast in it and flavor. This liquid can range from gray in color to almost black in color and smells like acetone.
Starter isn’t bubbly
If you notice there are no bubbles in the starter after 3-4 days even after 24 hours of fermentation, you need to continue days 3-4 until you get a bubbly starter after 24-36 hours after feeding.
Building natural yeast and bacteria depends on the yeast and bacteria in the air of your kitchen, on the utensils, and on the flour.
In kitchens where there is little to no fermentation regularly, this process can take longer so patience is the key.
My starter smells like nail polish remover
This is quite normal after the starter has fermented. The pleasant yeasty odor will eventually turn to the “acetone” smell (acetic acid) as the starter feeds on the flour.
Looking for a gluten free pancake recipe? TRY THESE GLUTEN FREE PANCAKES! They are made with buckwheat flour.
How to feed and maintain your starter
Store your starter in the fridge for the least amount of maintenance. Fridge kept starters do not require daily feedings.
Using the fridge method, use your starter until the jar only has 1/4 cup or less of starter left.
Feed the starter 1 cup flour and 3/4 cup of water. Keep in mind the feeding ratio can be changed depending on the texture of sourdough starter you prefer.
Cover loosely and let sit at room temperature for 6-8 hours or until your start to see activity. On warmer days this can happen more quickly, on cooler days it may take a bit longer.
Once you see activity (lots of bubbles and rising in the jar), move the starter to the fridge and use as needed.
Repeat this process over and over to maintain your starter.
How can this starter be used?
A gluten-free starter can be used much like a traditional starter, only with gluten free flour.
You can make artisan style bread, biscuits, muffins, sandwich bread, and more!
Frequently Asked Questions
While you can use any gluten free flour, I highly recommend using a 1:1 flour as it is much easier to use in all of your recipes as well. However, you can use organic brown rice flour, sorghum flour, or any combination of flours that are gluten free.
Yes, you can safely switch between these types of flour with no issues.
I was able to ferment dough with my starter after 7 days with a nice rise. It may take a bit longer but generally 7-14 days.
Absolutely! Fresh flour would be great for the sourdough starter. You can mill buckwheat, sorghum, or rice flour for this recipe.
Yes! Any sourdough discard recipe can be converted to gluten free using gluten free flour and discard.
In conclusion, making a gluten-free sourdough starter only takes flour and water and a bit of patience.
If you eat a gluten free diet, I hope you will consider making this starter!
Let me know if you make this by leaving a comment down below.
Save this tutorial and make this starter when you get your hands on some gluten free flour.


