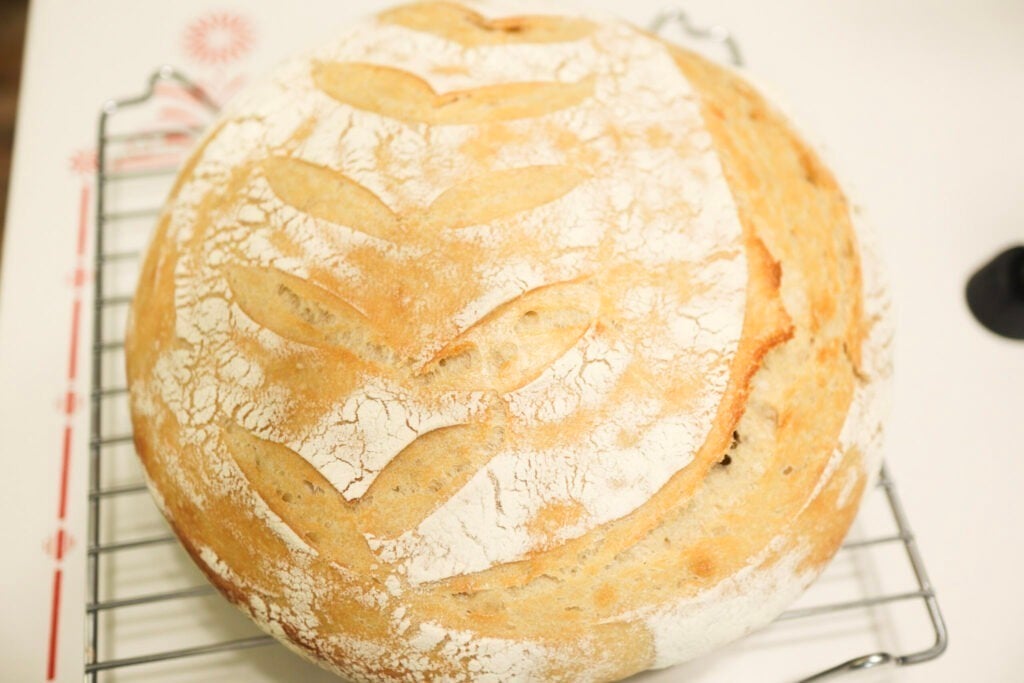
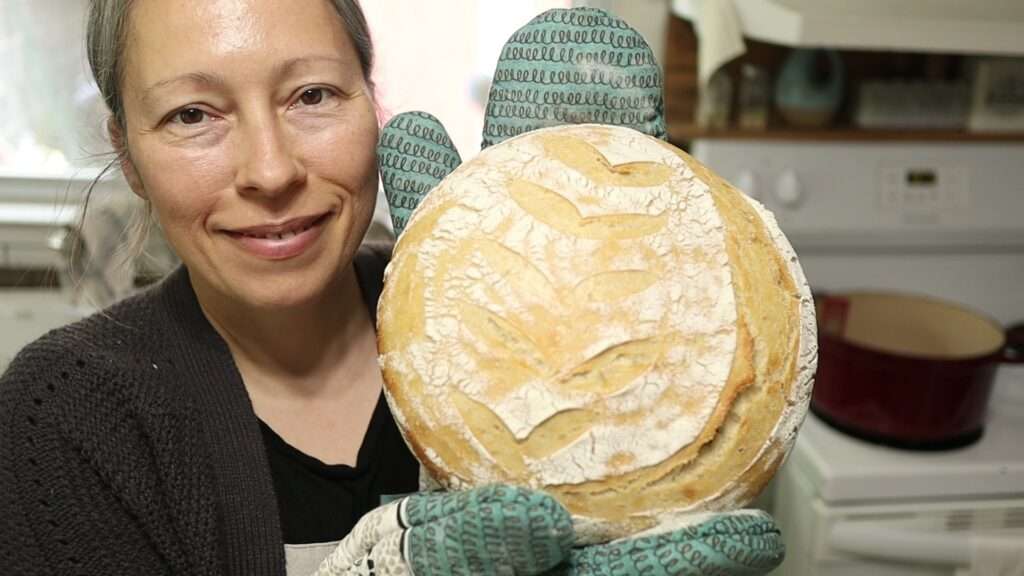
Easiest Sourdough Artisan Bread Ever | Beginners Loaf
I am always looking for easy sourdough bread recipes. This is such an easy sourdough artisan bread recipe.
Especially in spring, I need our bread recipe to be the least hands on as possible. If you are new on your sourdough journey, these simple sourdough bread recipes can help you gain confidence!
This post contains affiliate links. I may make a small commission on sales at no extra cost to you
A few days ago, I had a happy accident in the kitchen. I was getting ready for church and realized we were almost out of bread.
So, I took a chance and just mixed up the ingredients, shaped it, and put it in the oven when we got home. This sourdough bread recipe is one of the easiest I’ve ever made!
You know what? It was a wonderful loaf of bread! So, let me show you the easiest sourdough artisan bread EVER!
When I put that loaf in the oven, I was biting my nails a little, ha ha! I had never been so careless in my bread making!
At the very least, I always try to either knead it, stretch and fold it, or give it 2 rises. Well, I broke all the rules with this one.
It occurred to me that maybe, just maybe we don’t have to fuss AT ALL with our bread. What if we just mixed it and waited on it to rise and bake it?
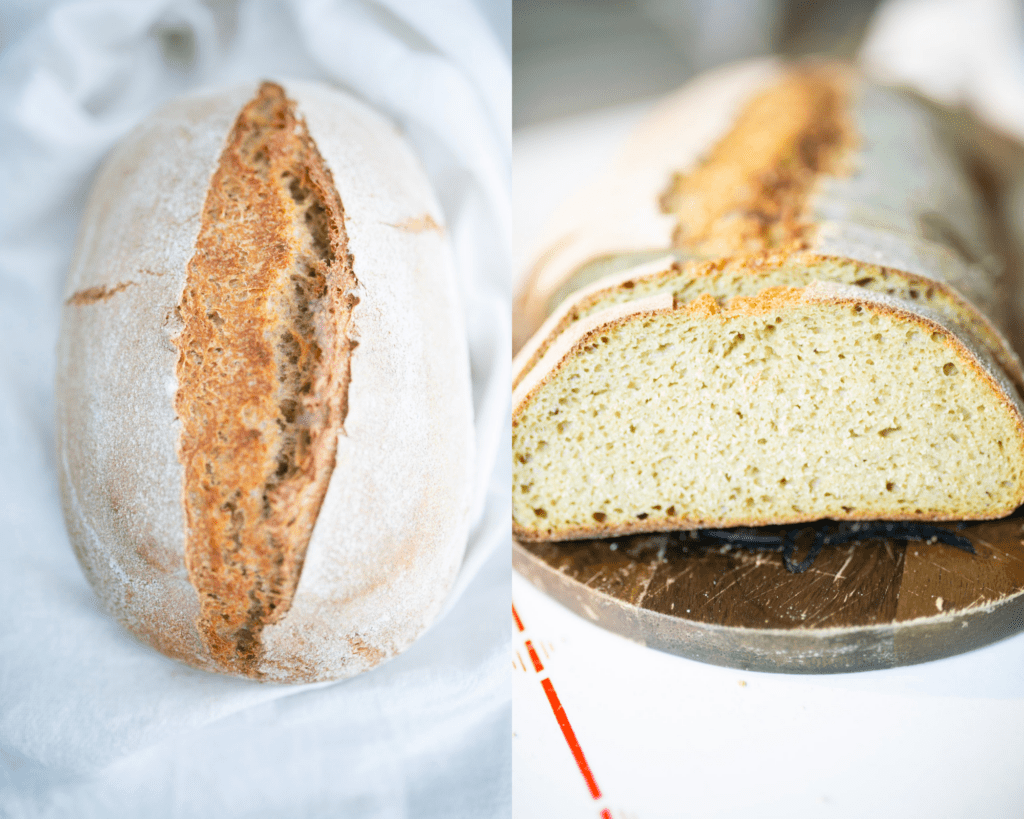
This particular recipe uses mostly all purpose flour with a little freshly milled whole wheat.
I will be developing this technique for 100% whole wheat next. (update: see below for fresh milled flour instructions)
So, for the beginner sourdough baker, this couldn’t get any easier. I wish I would have known this when I first started making sourdough!
What you need for this recipe:
Flour
You can use bread flour, all-purpose flour, whole wheat flour or a mixture of flour that suits your tastes.
In my kitchen, I prefer to use fresh milled flour (instructions below). I prefer the health benefits and flavor that the fresh flour lends to my bread products.
Water
I highly suggest using filtered water. Tap water often contains chlorine with can inhibit the wild yeasts from growing during the fermentation process.
Well water would also be fine to use.
The water can be room temperature or you can use warm water. Just don’t get it too hot. Keep it under 100 degrees F.
Sourdough starter
You will want to use active sourdough starter for best results. Active starter means the starter has been fed within the last 24 hours and is bubbly.
You can do the float test to check if your starter is active. Take a small piece of your starter and place in a cup of water.
If it floats, it is ready! Now, to be fair, I never do this:) I just use my starter straight from the fridge and it works like a charm.
Salt
I use Redmond’s Real Salt in my baking. Since this recipe only has a few ingredients, it’s important to use the highest quality ingredients available for the best loaf.
Tools you may need to make this Sourdough Recipe:
Proofing Basket
Also referred to as a banneton basket. This basket holds the shape of the dough preventing it from spreading out. These are widely available online to purchase.
This is the banneton basket I use: Proofing Basket
If you do not have a banneton basket, you can use a medium sized colander lined with a tea towel generously floured.
Damp Towel or Plastic Wrap
You will want to cover the dough during the bulk rise with either a damp kitchen towel or plastic wrap to keep it from drying out.
If you use a damp tea towel, you will need to occasionally re-dampen it to make sure the dough doesn’t dry out.
Dutch Oven
I use a 5 quart enameled cast iron from Lodge. The hot Dutch oven holds steam when preheated and makes for better oven spring while baking. It also lends to a crispy crust.
You can also use a granite ware oval roasting pan that has a lid in the same way. I actually use my roasting pan quite often!
***NOTE: Using 1 cup of starter is for a same day loaf. If you wish to allow a bulk fermentation overnight, add only 1/2 cup starter and adjust the flour in the recipe by increasing it 1/2 cup***
As spring gets busier and busier, I need a homemade sourdough bread recipe that literally takes the least amount of my time to make. But I obviously still want a delicious and nutritious loaf.
This sourdough recipe does not use commercial yeast but rather relies on the sourdough starter to rise the bread dough.
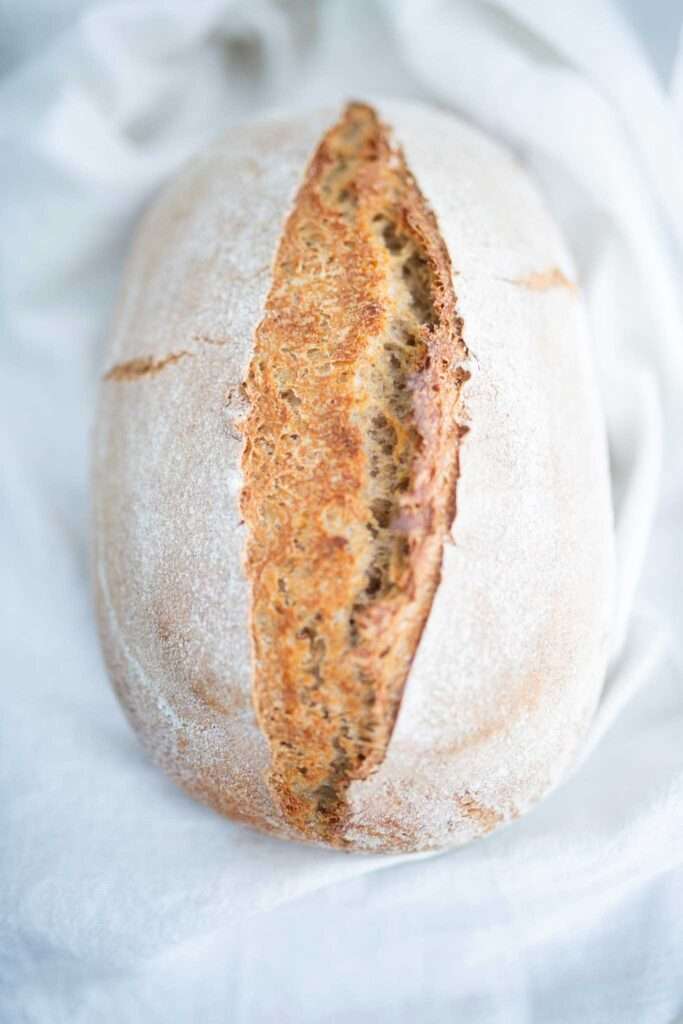
Artisan sourdough breads are those made in a closed baking vessel and allowed to develop a deep dark crust.

Step by Step Instructions for making the easiest sourdough artisan loaf ever:
Adjustments for making this recipe with 100% Fresh Milled Flour
I make all of my recipes in my own kitchen with fresh milled flour. I choose to do this because fresh flour is much easier on my tummy and honestly just tastes better.
I know a lot of you also like to mill your own flour, so I adjusted this recipe for 100% fresh milled flour.
To mill my wheat berries, I use the Nutrimill Grain Mill (use my coupon code: rose20 for $20 off!)
For this particular recipe, I used hard white wheat berries. Another great option is to use half hard white wheat and half hard red wheat.
This mixture will make a light loaf with a bit more flavor from the hard white wheat.
- Let the dough soak for 30 minutes to an hour after mixing the dough.
- Once the dough has soaked, put the dough on a lightly floured surface.
- Knead the dough for just a couple of minutes until the dough is smooth.
- Proceed with the recipe below.
The night before, feed your starter.
Alternatively, if you are like me and keep your starter in the fridge, as long as it was fed in the last few days, it will be fine. You won’t have to feed it prior to this recipe.
If you are interested in maintaining your starter in the fridge, click here for my tips!
Mix the dough
The morning of the day you want to make the bread, barely warm the water to lukewarm. Pour it into a large bowl. Add the starter and mix well until milky.
Add the flour and salt and mix well. You may need to use your hands to get it mixed completely.
This dough will be a bit sticky but workable. You don’t want a dry dense dough because that will turn out a dense loaf.

Shape the dough
Once it is mixed well, turn onto a very lightly floured surface and shape into a ball. Roll the ball around the surface to tighten the seam and build surface tension.
You can let the dough rest for 15 minutes and come back to do this again for even better tension.
Take your banneton basket or medium colander and line it with a tea towel. Generously flour the towel.
Add the ball of dough, seam side up, to the colander or banneton basket.
I prefer to use rice flour for dusting, but any flour will work.
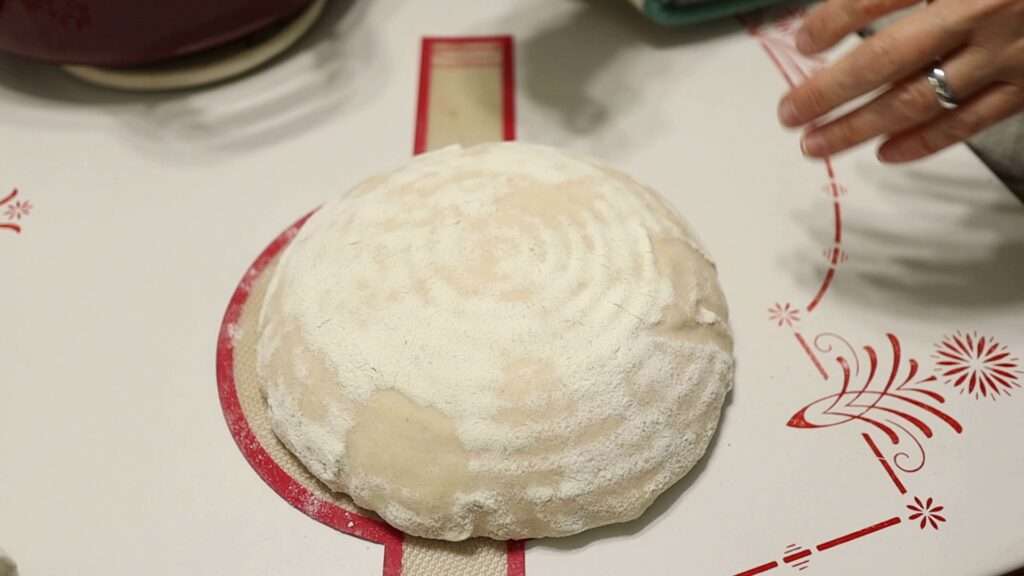
Rise
Cover and allow to rise for 4-8 hours. You will know it is ready to bake when an indention made with your finger stays in the dough. If it springs back quickly, cover and allow to rise a little longer.
Bake
Preheat your oven with the Dutch oven inside to 450 degrees F.
As stated above, I also like to use a granite ware oval roasting pan with a lid.

Take a piece of parchment paper and turn the dough, seam side down on the paper. Take a sharp knife or razor blade and slice the top of the dough.
Alternatively, you can use a bread sling made out of silicone like this one.
You can get fancy with this or just one slice into the top of the dough will work fine.

Place very carefully into the Dutch oven, place the lid on and bake for 20 minutes.
Take the lid off and continue to bake for 10-15 minutes or until golden brown.
Allow to cool completely before slicing.
For an easy no knead sourdough sandwich bread, click here: Easy No Knead Sourdough Sandwich Bread
Storage
Store in a plastic bag or airtight container on the counter for 3-4 days.
You can freeze this in a freezer safe bag for up to 3 months.
That’s it! The easiest artisan sourdough bread I’ve made yet!
FAQ’S
Can I make this recipe into a sandwich loaf?
Yes, just shape and put in a 9×5 loaf pan. Bake at 350 degrees F for 35-40 minutes or until internal temperature is at least 195 degrees F.
What if my bread doesn’t rise?
One main culprit is a young sourdough starter. The more you use the starter the more mature it becomes. If your starter is younger, just be patient and wait for it to rise. It will take longer.
Why did my dough turn to a soupy mess?
This is from over proofing the dough. It can happen especially in hot months when the bread rises more quickly. Try to keep a close eye at these times of the year and catch it a bit earlier.
Can I make this recipe up and let it proof overnight?
You can but with a modification. I would mix up the dough, put it in the banneton basket, cover and put in the fridge after 1-2 hours at room temperature.
Can I make this with a mixture of whole wheat flour and all purpose flour?
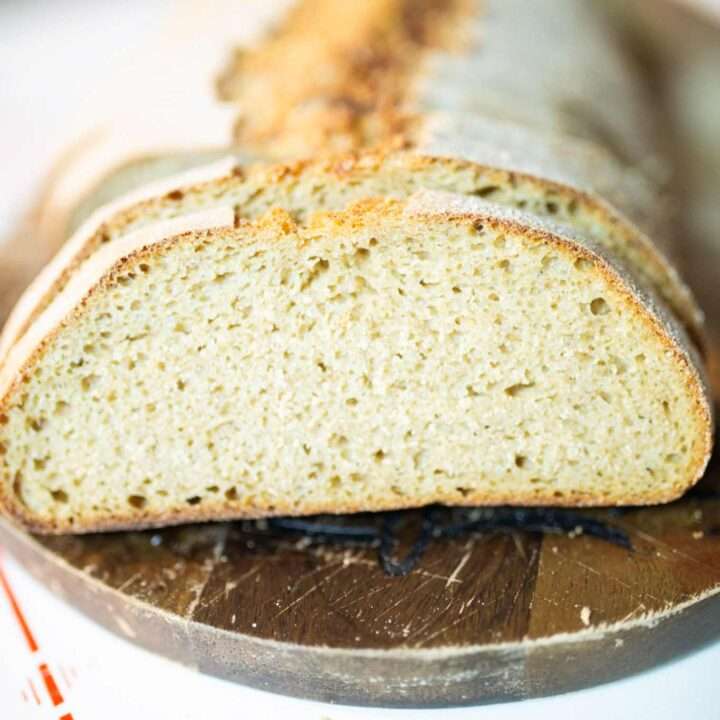
Yes! This will make a much more flavorful loaf! I would recommend using 1/2 all purpose flour and 1/2 whole wheat flour for the best loaf. It will be light and airy with a ton of flavor from the whole wheat flour.
Easiest Sourdough Artisan Bread, EVER!
To say this is an easy recipe is an understatement! This sourdough artisan bread is not only easy, but, delicious!
Ingredients
- 1 1/2 cup lukewarm water
- 1 cup sourdough starter
- 3 1/2-4 cups unbleached all-purpose flour
- 1 1/2 tsp salt
Instructions
- **Note: For instructions for making with Fresh Milled Flour, see notes below**
- In a large mixing bowl, add the water and starter. Mix well.
- Add 3 cups of the flour and the salt. Mix well.
- Add the additional flour 1/4 cup at a time until a soft ball of dough forms.
- Turn the dough on a very lightly floured surface and shape into a ball of dough.
- Pull the dough along the surface to tighten the seam and build tension of top.
- Take a banneton basket or colander and line it with a tea towel.
- Generously flour the towel and add the ball of dough seam side up. Cover.
- Allow to rise 4-8 hours. When an indention made with your finder doesn't spring back quickly, it's ready to bake.
- Preheat oven with Dutch oven inside to 450 degrees F.
- Turn the dough onto a piece of parchment paper.
- Slash the top of the dough with a very sharp knife or razor blade.
- Add the dough (with the parchment paper) into the Dutch oven very carefully.
- Put the lid on and bake for 20 minutes.
- Remove the lid and bake for an additional 15 minutes.
- Allow to cool completely before slicing.
Notes
Adjustments for making this recipe with 100% Fresh Milled Flour
- Let the dough soak for 30 minutes to an hour after mixing the dough.
- Once the dough has soaked, put the dough on a lightly floured surface.
- Knead the dough for just a couple of minutes until the dough is smooth.
- Proceed with the recipe.
Nutrition Information
Yield 12 Serving Size 1 sliceAmount Per Serving Calories 131Total Fat 0.35ggSaturated Fat 0.18ggTrans Fat 0gUnsaturated Fat 0.42ggSodium 287.5mgmgCarbohydrates 27.67ggFiber 1.08ggSugar 0gProtein 4.08gg


I tried the recipe today. While I questioned the amount of starter, thinking there was a typo error, I made it anyway. Not sure where the problem is but I used your recipe exactly and the dough remained sticky even though I did use the 4 cups…and then some. I baked it just as your recipe called for and found the inside quite doughy so baked it for another 15 mins and it could have baked another 20 instead. A full cup of starter seems like quite a bit when the other recipes I’ve used call for between 1/4 cup to 1/2 cup. Is there something I missed?
I’m not sure what could have happened. I always use 1 cup starter for same day recipe and 1/2 cup for overnight ferments. I make this quite often and have never had an issue like that. It may be that your starter is much thinner than mine and made the recipe a bit more hydrated. You can try the recipe with 1/2 cup starter and see how it goes. It will still rise, it will just take longer.
Hi, I unfortunately didn’t find your website until after I had a disaster of a sourdough bread loaf. I tried to make I did my starter. It went on for eight days. I have some remaining starter in my fridge and I’m wondering if I use my starter in the fridge can I use your recipe and try that it’s so much easier than the one I tried that turned out to be a lead flying saucer. Also, my Dutch oven may be too hot. The other bread never rose very much and I thought well maybe it’s gonna rise when it bakes and it didn’t. It was real hard and looked overcooked on the outside and then the inside wasn’t completely baked and again it didn’t rise so I just don’t know what I might’ve done wrong. I did everything this other said to do and letting it rise letting it rise again, waiting, waiting waiting waiting It’s such a disappointment or should I just start all over again? Do you have a starter recipe? Thank you.
Made my very first sourdough bread ever today, and your recipe was amazing! I have been nervous for the past 10+ days working my starter but it actually came out. We are thrilled for your website, thank you!!
I made this bread with 1/2 cup organic rye flour instead of whole wheat, which was still amazing. I did not need the full 4 cups (I’m in the Seattle area in February). The crumb was pretty tight but it was yummy.
This was fantastic. So yummy served with homemade butter and a drizzle of honey.
If I am worried about over fermentation on bulk rise, can I put it in the refrigerator till I’m ready to bake?
Absolutely. I would say the fridge is your best friend with sourdough. You can leave it in the fridge for up to a week even if you need to.
Thank you so much! I baked this morning. I let it sit at 75 degrees for 8 hours. It looked doubled I put in fridge till this morning. And baked in cold oven method @ 450. It didn’t spring much but the texture and taste is good. I wasn’t sure if I should do a second rise. I had better luck when our climate was cooler.this bake was better than the last soupy few.
Oh my gosh just did this recipe with some whole wheat as suggested, it is THE perfect texture and crispiness of the crust, amazing! This is my second loaf ever made!
Yay, that’s awesome!
I’m confused. Is there no kneading or stretch and folds? Just mix together and let rise?
No, there’s neither. Just mix and let rise! Super simple recipe and makes a beautiful loaf!
I absolutely want to try this…if it’s anything like yr sandwich loaf…I cant wait…but I’m worried that I’m ysed to baking more advanced sourdough with all the stretch and folds…so wont this bread be a bit more of a tighter crumb having not had the work of required of a normal sourdough…?
Still I cant wait to try it…thank you.
Mary also are you affiliated with Healey Homestead…another sourdough baker.. ok thanks…much
It is a bit of a tighter crumb, for sure. But makes a wonderful bread especially for someone new to making artisan bread. I haven’t heard of Healey Homestead. I will have to check them out.
Thrilled to have found this unfussy sourdough recipe! My first 2 (ever!) loaves have both turned out great following this method. Thank you for making a simple beginner friendly recipe!
Should it proof at about 75 degrees
Ideally, but, anything about 70 will be just fine.
Good Morning,
I am attempting to make your Easiest Sour Dough Bread recipe. If I may make a suggestion to your instructions…when adding the starter it would have been nice to know that the one cup starter amount is for the same day bread option, and if you want to let it rise overnight use 1/2 cup of starter. I’m a novice at this sourdough fermentation process so any helpful tips are appreciated. I will see what happens with this first loaf. It may not be Artisan Bread.
Lol
Thank you for this suggestion. I will make a note on the blog post right away!
Is this fed or unfed starter?
This is made with active fed starter.
I am brand new to sourdough and have been trying a few ideas and techniques I’ve found on Facebook. I saw your video of you making this gorgeous bread in an oblong banneton basket. The loaf had minimal folding and stretching and rested in the frig overnight. When baked, it was a beautiful golden brown loaf. I signed up for your emails just to find that recipe, but I don’t see it. I know it started with water and starter mixed, then the AP flour and salt added. And any one help me find that recipe, I want to make it to show off, but need the rest of the instructions.
Hi Mary, this will be my next bread to make soon! My ? I was thinking to ferment over night & as you mentioned 1/2 cup is ample for the starter. But should I change the water amount to 1 1/4 cups & flour to 3 or 4 cups. I’m beginning to understand more & sense if I cut back on the water, I should cut back on the amt of flour too. Is that correct. I think I will also use some rye flour too. Tks so much, I appreciate your insights!
Yes, add an additional 1/4 cup water and 1/4 cup flour at first to make up for the 1/2 starter you took out. Then add up to another 1/2 cup of flour just until you get a dough you can work with. A good way to look at it is 1 cup of starter is equivalent to 1/2 cup of flour and 1/2 cup of water. So adjust your recipes according to the amount of starter you use. 1/2 cup starter is 1/4 cup flour and 1/4 cup water. I hope that helps!
Thank you Mary for responding! So please let me know again to clarify. This way I can do it your way & always refer. To ferment over night I use 1/2 cup of starter:
How much water & how much flour. If I do not want to ferment over night, 1 cup starter & how much water & how much flour. If I
Can get the very basics down, it will help me which way I decide to make the bread. Also this time I want to add some rye flour, & bread flour & some whole wheat. You have been an inspiration to me & my daughter in law wants to learn as well! She also liked watching your videos! I bought the round green banniton & will use that one at this time. Thanks again 💗 I feel a bit silly about asking again because I did seem to understand when watching the 2 different vids: for the basic beginner bread I used as you directed 1/2 cup starter, 1 1/4 cups water & 3 cups of flour & fermented over night. For the other recipe for same day baking you said 1 cup starter, 1 1/2 cups water & 4 cups flour. Basically I just want to confirm with you. Thank you for your patience 🙏 💗 🙏
Yes, you’re right!
HALLELUJAH 🎉🎈🎉
Hi Mary! I’ve been following your channel for a few weeks now. I made my own starter with your help and today I made my first sourdough loaf! It was a little sticky for me but I know my starter is more watery than yours. I’ll use less water next time. But this bread came out amazing and everyone loved it. I appreciate you!
Hi Mary!
Yesterday I made this bread! It turned out amazing! I used whole wheat, bread flour & rye flour. I also placed it in a cold oven & baked it on 450 for 55 min & top off for about 5-8 min I’m so enjoying your method! Thank you again 💓 😊 💗
I made the overnight-rise version and baked it this morning for breakfast, and I’m so excited that it came out edible and tasty! It wasn’t nearly as pretty as yours. My dough was still too wet using only three cups of flour. I did add extra, but was afraid to keep adding so it was still a bit sticky when I decided just to leave it be and cover it for the night. Thank you so much for showing us how to make bread!
Eager to make this but wondering if you’ve tried it with 100% whole wheat yet? Thank you for sharing so much helpful information!
I have made it with whole grain flour. The changes I made were to soak the flour and water for 30 minutes before proceeding with the recipe. It doesn’t have the light airiness of the all purpose loaf but it is so delicious!
Thank you! I’ll try it!
Love this recipe! I was wondering if I could use bread flour instead of all purpose flour and if so is there any changes in the recipe.
You can alternate between the 2 flours with no real changes in the recipe. I’ve used both and they work really well.
Hi Mary,
Do you think I could make this bread but instead of making it in one day, I could place it in the frig after it sits for a few hours on the counter in the banniton & in the morning score it & bake the next day. Thank you 😊
Yes, I have done this and works great!
So, if I were to do what Amy Jean asked, can it be baked right from the fridge, or does it need to warm up on the counter a while?
And one more question I can’t find the answer to….the starter….if I keep in the fridge, I put it IN the fridge after a feeding and once it gets good and bubbly right? When I take it out to bake with it, do I take it out the night before and feed it? Or just take it out and use it straight away without feeding and warming up?
I have made this recipe, the over night version, a few times and love it. What if I want to add something like diced cheese and rosemary, at what point in the process would I do that?
I add my add-ins while I’m shaping the dough. I turn it a few times to make sure they are well distributed.