How to Make Homemade Peanut Butter (No Added Sugar)
Store bought nut butters are often wrought with added sugar, oils, and preservatives. As a from scratch cook, one of the first things I started making at home was homemade peanut butter!

It’s so easy, simple, and much more delicious than peanut butter from the shelf. Creamy, only 2 ingredients, and perfect slathered on a slice of homemade fresh milled sourdough bread!
This post contains affiliate links. I may make a small commission on sales at no extra cost to you. As an Amazon Associate, I make commission on qualifying purchases
Why you’ll love this recipe
- Only 2 ingredients – This healthy homemade peanut butter needs only unsalted, roasted peanuts and a little salt!
- No added sugar – You won’t miss the sugar in this creamy homemade version! Store-bought brands are often packed with added sugar!
- Budget friendly – It’s less expensive to buy peanuts and make your own butter! Grocery store “natural” peanut butter is quite costly, so this option is great for those who are budget minded.
- Customizable – You can determine the texture of your homemade peanut butter, crunchy or smooth nut butter!
- Perfect for sandwiches – This peanut butter begs to be spread on a warm slice of FRESH MILLED SOURDOUGH SANDWICH BREAD!
Ingredients for this Homemade Peanut Butter Recipe
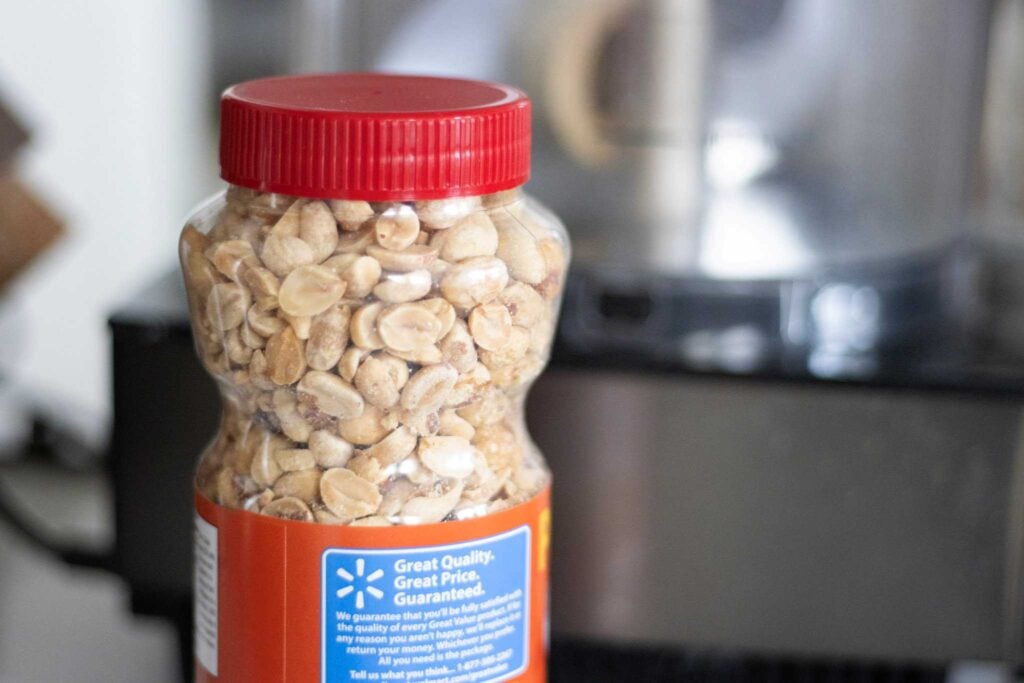
- Roasted, Unsalted Peanuts – Avoid the salted peanuts as they have many added ingredients.
- Salt – I prefer to use a fine sea salt.
Full ingredient amounts in printable recipe card below
Tools you need to make this easy recipe
To process the peanut butter, you will need a FOOD PROCESSOR
Note: You could also use a high-powered blender like a VITAMIX BLENDER
For transferring the homemade nut butter to the container, I prefer to use a SILICONE SPATULA
For storing the peanut butter, I use a MASON JAR
Looking for another pantry staple you can make at home? TRY MY POWDERED COFFEE CREAMER!
How to make Homemade Peanut Butter (Step-by-Step)
Step 1. Add Peanuts and Salt
Add the dry roasted, unsalted peanuts and salt to the bowl of your food processor. A 16 ounce jar is 2 cups of peanuts.
Step 2. Process
Turn the food processor on high and process 2 minutes for Chunky and 3 minutes for Creamy. You may need to pause and scrape the sides of the bowl once or twice during processing.
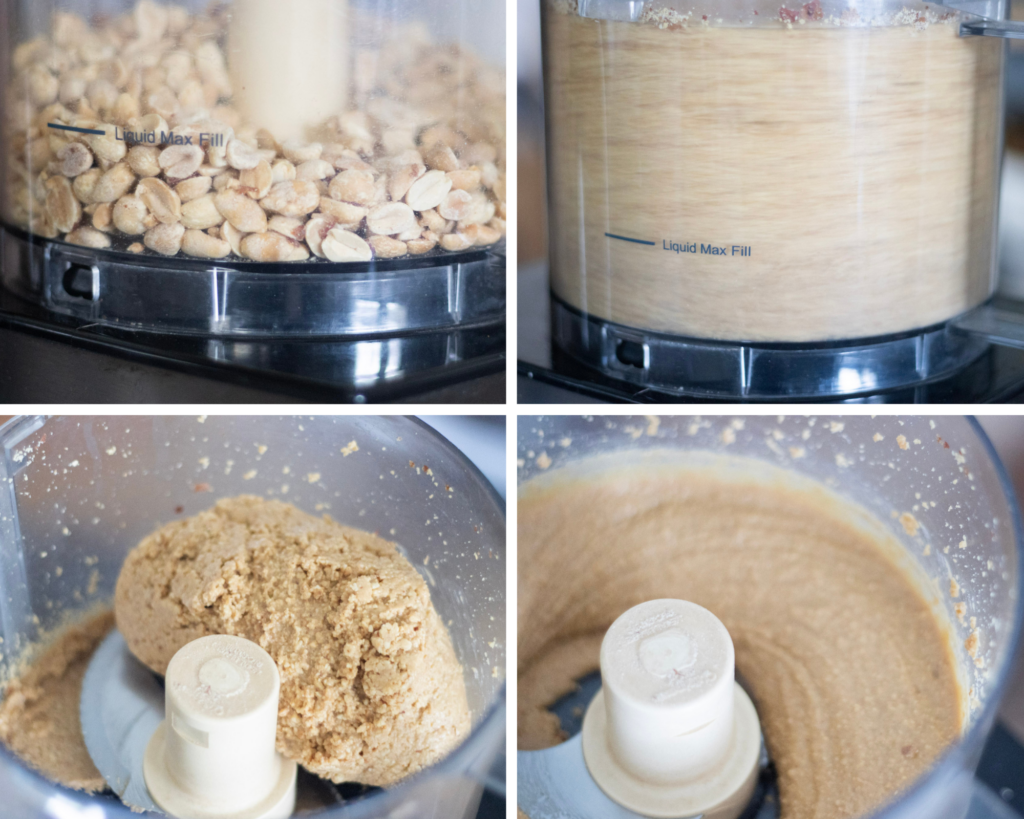
Note: After 1 minute the mixture will be a thick ball rolling around in the processor. This is normal and will work itself into the blades
If using a Vitamix Blender, pour ingredients into the pitcher and use the tamper to push the ingredients into the blade for processing until creamy.
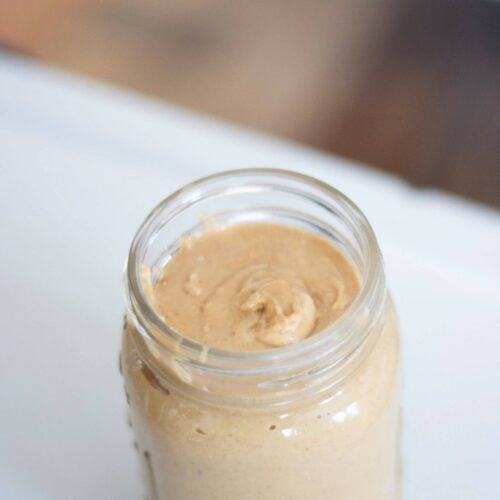
Step 3. Store
Transfer the peanut butter to a jar with a tight-fitting lid using a rubber spatula. Store the peanut butter in an airtight jar on the countertop at room temperature for 1-2 weeks.
Texture phases while making peanut butter
0-1 minutes: The mixture will be dry, crumbly, and start amassing into a ball.
1-2 minutes: The ball of peanuts will start to pull down into the blade and start processing. After 2 minutes, the mixture resembles crunchy peanut butter.
2-3 minutes: The mixture will become smoother and creamier. After 3 minutes, the mixture is velvety and smooth.
Each food processor is different and the times given are for my particular machine. Yours may take up to 4-5 minutes depending on the size of your food process and motor size.
My TOP TIPS for making the perfect peanut butter
Use unsalted, dry roasted peanuts for the best flavor.
Never add water or oil to the mixture.
Be patient! It will take a few minutes for the mixture to come together. I usually set a timer for 3 minutes and walk away. Look in on the mixture occasionally to see if the sides need to be scraped down.

Flavor Variations
Add 1-2 tablespoons of honey or maple syrup while processing for a naturally sweet butter.
After processing, fold in chocolate chips for a protein packed treat the kids will devour!
How to store homemade peanut butter
Store your fresh nut butter in a mason jar with a tight-fitting lid or airtight container. It will last on the counter for 1-2 weeks and in the fridge for 1-2 months.
How to use homemade peanut butter
- Spread on FRESH MILLED SANDWICH BREAD and top with a drizzle of honey.
- Add your fresh nut butter to your daily smoothie to up the protein and flavor.
- Serve alongside apple slices or banana slices.
- Scoop a dollop in your yogurt bowl for a delicious twist on breakfast.
- Use in baked goods like peanut butter cookies or granola bars.
Frequently Asked Questions
You need to process longer. Each food processor is different and the times given are for my particular machine. Yours may take up to 4-5 minutes.
No. Peanuts contain natural oils that will be released once they warm up and process.
Sure, but the flavor is much better with roasted peanuts.
As you can see making your own peanut butter is so easy! If you make this, let me know in the comments below!
Tag me on Instagram: the_rose_homestead with a pic!
How to Make Homemade Peanut Butter (No Added Sugar)
Equipment
- Food Processor
- Silicon Spatula
- Mason Jar with Lid
Ingredients
- 16 ounces Dry Roasted, Unsalted Peanuts
- 1/2 tsp Salt
Instructions
- Add the peanuts and salt into the bowl of your food processor.
- Turn on high and process for 3 minutes for creamy peanut butter.
- If you prefer crunchy peanut butter, process or 2 minutes.
- Note: After 1 minute of processing, the mixture will appear dry, crumbly, and come into a large ball.
- Continue processing until your preferred texture is achieved.
- You may need to scrape the sides of the bowl down 1-2 times during processing.
- Depending on your particular food processor, processing times may vary. If your peanut butter isn't creamy after 3 minutes, continue to process.


Will your Peanut Butter recipe work to make Almond Butter the same way?
Yes. I recommend roasting the almonds first in a 325 degree F oven for 8-10 minutes, allow them to cool, and proceed the same.