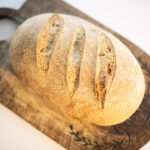
Garlich and Herb Sourdough Artisan Bread
Incredibly delicious, this garlic herb sourdough loaf is one of the most flavorful sourdough loaves. Perfect for toast or as a side for most any meal!
Servings 12 slices
Calories 164.2kcal
Equipment
- 1 Dutch Oven
- 1 Banneton Basket
Ingredients
- 325 grams water
- 100 grams sourdough starter active/mature
- 500 grams flour
- 2 tsp salt
- 6 cloves fresh garlic
- 2 tbsp fresh herbs or 2 tsp dried herbs
Instructions
- In a large bowl, add the water and sourdough starter. Mix until cloudy.
- Add the flour and mix slightly. Add the salt.
- Mix until a shaggy dough forms. Cover with plastic wrap and let rest for 1 hour.
- In the meantime, chop your herbs and garlic.
- After an hour, it's time to start stretching and folding the dough.
- On the first stretch and fold, take the bread dough out of the ball and place on your work surface.
- Spread the dough out into a rectangle and pour the herbs and garlic on top of the dough.
- Starting at a corner of the dough, pull up and over into the center all the way around the dough.
- Lightly knead the dough until you can see the herbs on the surface of the dough.
- Place back in the bowl and let rest for 30 minutes.
- To perform each stretch and fold, pull up on a corner of the dough and lay it over the center of the dough.
- Do this all the way around the bowl by turning it a quarter turn in between each stretch and fold over of the dough.
- Cover and let rest 30 minutes. I prefer to do 4-6 sets of stretch and folds with my artisan bread.
- Once you have performed 4-6 stretch and folds, cover the dough and let the dough rise for 4-8 hours.
- After the dough has risen for 4-8 hours depending on the strength of your starter, prepare a banneton basket.
- To prepare the basket, line with a linen or cotton tea towel and generously flour. Rice flour works remarkably well for this application.
- Turn your dough onto your work surface smooth side or top side down.
- Do a final stretch and fold to shape the dough.
- Turn the dough over with the smooth side up and drag the dough ball on the table to build tension.
- I prefer to do this several times to make sure the top of the dough is very tight.
- Place the dough top side down into the banneton basket.
- Stitch up the seam side to keep the tension on the top of the dough.
- Cover with plastic wrap and place in the fridge for at least 6-8 hours or up to a few days.
- The next morning, preheat a Dutch oven in the oven to 450 degrees F.
- Once it is preheated, take the dough out of the fridge and turn it onto a piece of parchment paper.
- Make a slash in the top of the dough with a sharp knife or razor blade.
- Carefully remove the Dutch oven from the oven and remove the lid.
- Move the loaf of bread to the Dutch oven and replace the lid.
- Bake for 20 minutes covered.
- Remove the lid and continue to bake for 15 minutes.
- Allow the bread to cool on a wire rack completely before slicing.
Notes
Store in an airtight container or plastic bag on the counter for 3-4 days.
Freeze in freezer bag for up to 3 months.
Nutrition
Serving: 1slice | Calories: 164.2kcal | Carbohydrates: 34.25g | Protein: 4.5g | Fat: 0.42g | Sodium: 383.42mg | Potassium: 30.83mg | Fiber: 1.25g | Sugar: 0.17g | Calcium: 3.33mg | Iron: 0.48mg